Generate patches from large images with webhooks
This document will showcase how to split up large images into smaller patches and save them into a new dataset using existing functionality in V7 Darwin. More explicitly, we will look at how to leverage V7 workflows and webhooks.
An example FLASK server using the V7 Darwin-py python repository to produce patches from larger images and upload them to a new dataset is made available at the V7 GitHub here.
Why is it useful?
When handling large images, there are a variety of reasons why it can be useful to convert them into smaller patches. One reason is the limit of GPU memory that will regulate the maximal image size that can be used for training your neural networks. A common method to handle limited GPU memory is to downsize the images, but that is not always a viable strategy. Images with small objects can have them reduced to only a couple of pixels in size after down sampling and reduce the model's ability to correctly find and delineate those objects, for example. In this case, it can be beneficial to instead use augmentation strategies such as cropping, or just split your images into smaller patches.
The ability to generate patches from a large image, either by splitting up the image or to manually choose areas to generate patches from for a downstream task can be used for a myriad of other reasons as well. Such as quality control, designing a new dataset for task X, making it easier for annotators to work on images with a lot of details and/or objects, and so on. In this guide we hope to give you building blocks to support with above tasks but also enable you to build workflows we have yet to imagine.

Satellite images of the pyramids of Giza from NASA
Generating Image Patches on V7
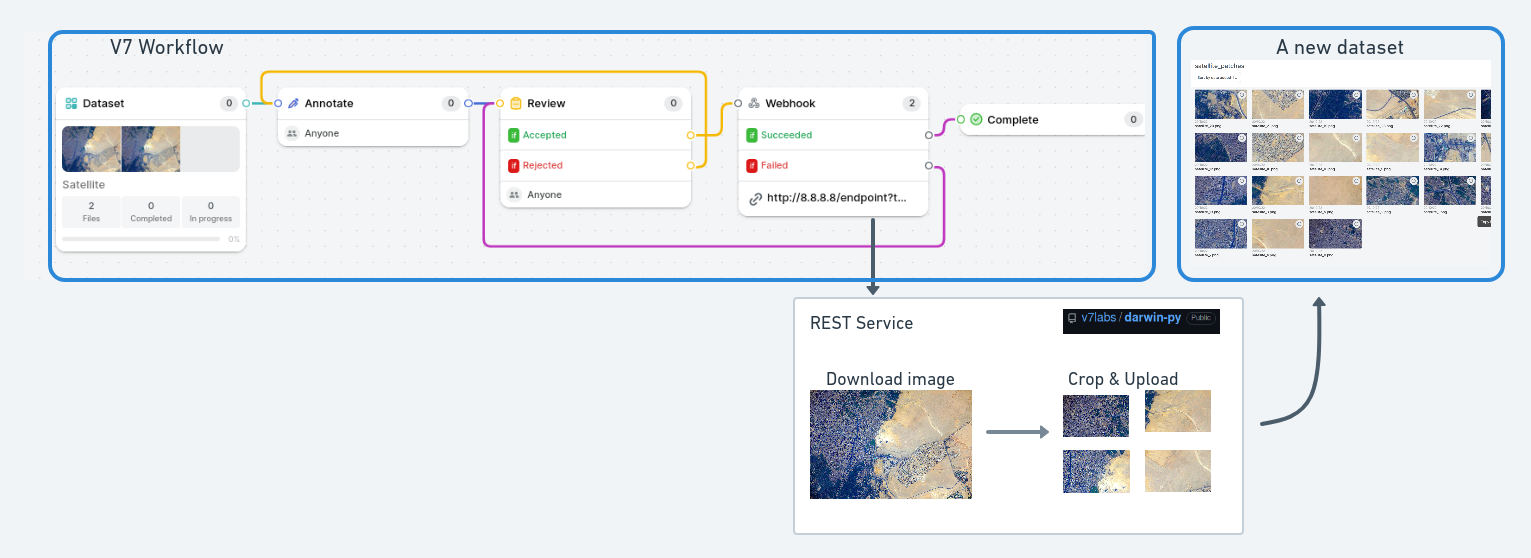
Let's start with visualizing what an example workflow looks like. As seen in the following image, there are three components to that needs to be in place. First thing to set up is a V7 workflow that in this case takes a dataset with large satellite images, an annotation step where patches are defined by bounding boxes, a review stage to check the quality and then a webhook stage that will send information about the images and the newly made annotations to a REST server. The REST-server will in this case use the Darwin-py Python library to read the annotations sent to the REST-server, crop out patches from the large images and then upload the results to a new dataset that is ready to be used for other downstream tasks such as model training.

Workflow visualization, generating a new dataset with patches from large images by utilizing webhooks.
The V7 webhook workflow
Let's take a closer look at the V7 webhook workflow. To use the provided example REST Service to crop the images, the annotations first needs to be formatted in the correct way. We currently support images (not videos or 3D volumes) and the crops are defined by using bounding box annotations. This bounding box annotations need to contain the keyword patch in the name to be used for cropping by the server. This is useful is you want to choose key areas of interest to use for further down-stream tasks.
Adding the formatting (NxM) to the annotation name will further crop the marked area into NxM patches of equal size. This is very useful if you need to crop the whole image or a smaller area of it into multiple patches very quickly, a tip here is to a use copy of the annotation between images (Ctrl + c) → (Ctrl + v) to quickly apply this transformation on multiple images. Using the annotation name
patch (6x4)will for example generate 24 equally sizes patches from the marked area in the original image and upload it to your target dataset. Additional information about V7 workflows can be found here.
Configure your V7 webhook
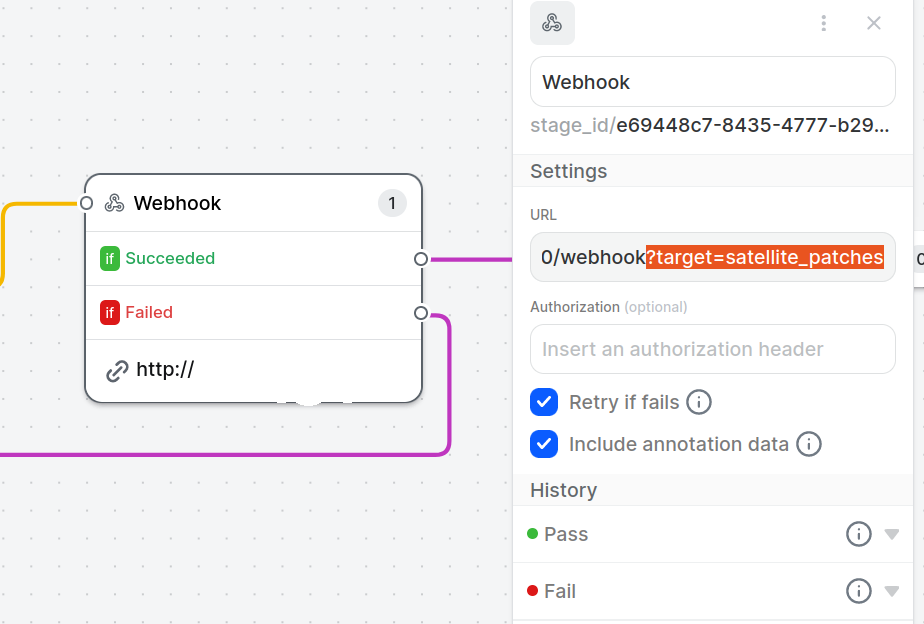
There are two things we need to get in place to have the webhook communicate with the provided REST-server. First is the URL, then a target query needs to be added. This is how we pass information of where to upload the generated patches. The formatting is as follows:
https://[your-ip-address]:[port]/webhook?target=[dataset_name]The default port using the example code is 8080 and the target dataset needs to be in the same project as the input dataset and the built workflow. The IP address required is the public IP address of the server where the provided REST server is hosted. An example URL could look like:
https://8.8.8.8:8080/webhook?target=satellite_patchesJust make sure that the target dataset is an existing (perhaps empty) dataset in your project. Additional details about webhooks can be found here.

Set up the REST-server
All instructions on how to install and run an example version of a REST-server that can parse patches in the manner outlined above can be found in the readme in this public V7 GitHub repo.
Once the REST server is up and running, you can start annotating and process images through the workflow described above to seamlessly generate patches from larger images. The provided code is offered as-is and serves as an example of how you can customize and automate tasks using workflows and webhooks. You’re welcome to use it as a template for creating your own webhook-based tasks
Updated 5 months ago
