Masks
V7’s pixel perfect semantic segmentation tool means you can create the annotations that make the most sense for your use case.
When to Use Masks
Masks and Polygons are both used for object segmentation, and both classes have their own strengths & use cases. The choice between Masks and Polygons depends on the specific requirements of the task and the characteristics of the objects being annotated.
A file can contain both raster and polygon annotations.
Use Cases
Semantic masks can be more suitable than polygons for some use cases. These use cases could be:
- To catch fine details - masks allow you to annotate at pixel-level accuracy
- For complex objects - masks allow you to annotate items with complex boundaries with more flexibility
- When a pixel should only have one identity - masks do not allow pixels to have multiple identities, like polygons
Mask Set Up
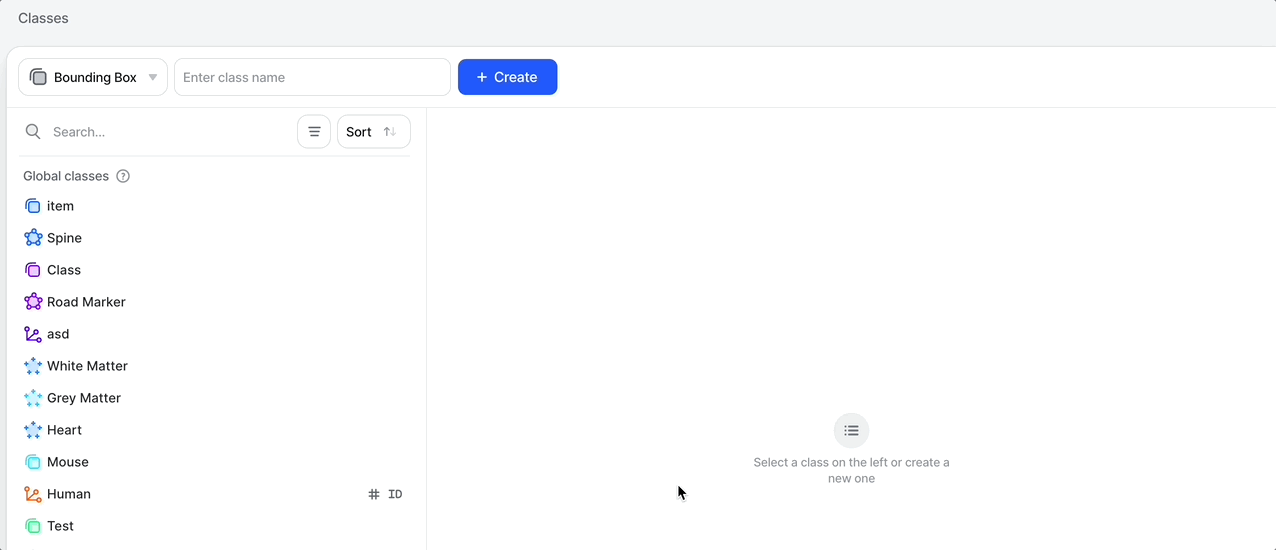
In the Classes menu, you can create a Master annotation type by selecting Mask in the dropdown menu:
Creating Masks and Working with Mask Instances
The best way to create a raster annotation is with the Brush tool, in combination with the Zoom tool.
Don't forget to use the shortcut keys [ and ] to increase and decrease the size of the brush, and e and f keys to swap between eraser and brush!

Mask annotations are currently not supported for tiled images
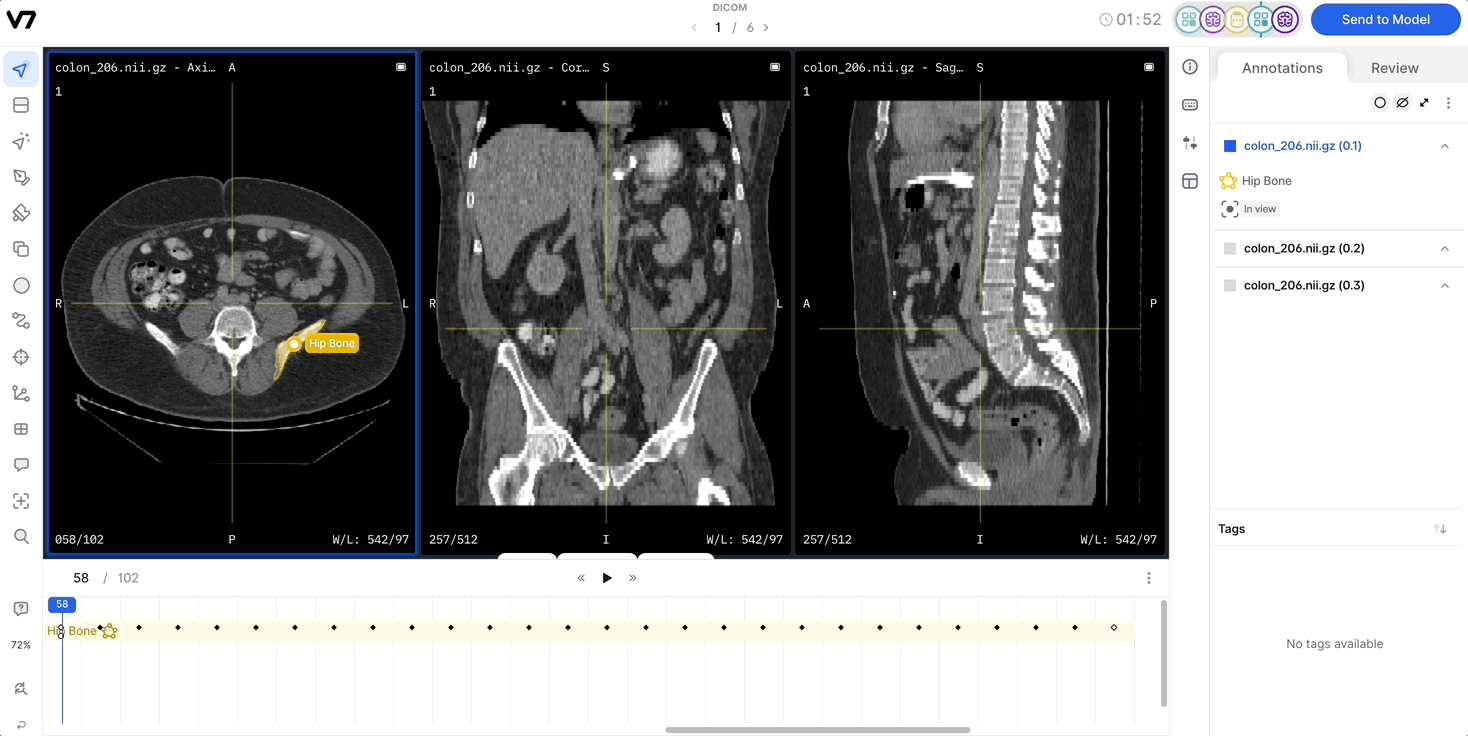
Mask Instances: Selection, Editing, and Merging
- When creating or editing masks, you can have multiple instances of the same class (e.g., multiple cells, nuclei, etc.), each with its own unique ID and properties.
- To edit an existing mask instance, select it on the canvas, in the annotation side panel, or in the timeline (if present). Selected masks are highlighted in all these locations.
- If no mask is selected, creating a new mask will generate a new instance.
- To deselect a mask, press
Escapeor use the edit tool and click away. - If you accidentally create multiple instances, you can use the merge functionality to combine them into a single annotation. Multi-select two masks of the same class using Cmd + Click, then right click to unify, or use the hotkey Ctrl + M.
Use SAM to Save TimeYou can now use SAM to create Mask annotations on images & videos. Please see this page to see how to do this: Using SAM in V7
Converting Polygons to Masks
If your workflow includes generating polygon outputs, or you need to leverage certain annotation features exclusive to polygons, consider using our 'Convert to Mask' feature. This is particularly useful if you plan to view annotations in 3D.
How to Convert a Polygon to a Mask Annotation
- Add Mask Class to Dataset: Ensure that the mask class you intend to convert to is already added to your dataset.
- Select the Polygon:
- Use the 'Edit' tool to select the polygon you wish to convert.
- Convert to Mask:
- Open the dropdown menu and select the mask class you want to convert your polygon into.
- Optional - Retain the Original Polygon:
- If you need to keep the original polygon, make sure to copy and paste it before you convert it.
By following these steps, you can seamlessly convert polygons into mask annotations suitable for your specific needs.
Limitations
Exporting and Importing Masks
- JSON Export: Fully supports mask instances. Each annotation is exported with a unique ID and mapping.
- NIfTI Export: Mask instances are not supported. All mask instances are merged into a single semantic mask per class (instance information is lost).
- NIfTI Import: Mask instances are not supported. NIfTI files can only be imported as semantic masks, not as individual instances.
Please refer to the Darwin JSON schema to understand how Masks are represented in exports.
Hardware and WebGL Limitations
- Masking on tiled images depends on your device's GPU capabilities and WebGL support. Most devices support images up to 16,384 x 16,384 pixels, but this may vary.
- If your image exceeds the supported size, masking will be disabled and a warning notification will appear. You can check your device's maximum supported image size at webglreport.com.