Annotate DICOM & NIfTI files
V7 supports DICOM and NIfTI annotation on our Business and Pro plans. We've put together the guide below to give you and your team everything you need to label your medical imaging files.
Upload files and extract views
Before uploading a series to V7, we'd recommend zipping the series together outside of V7 and renaming the .zip file to .dcm.
This will upload the study as a series of slices, allowing your team to create labels that span several slices, and enabling the use of interpolation to help automate the labelling process.
If a series is not zipped together, each slice will be uploaded as an individual image:
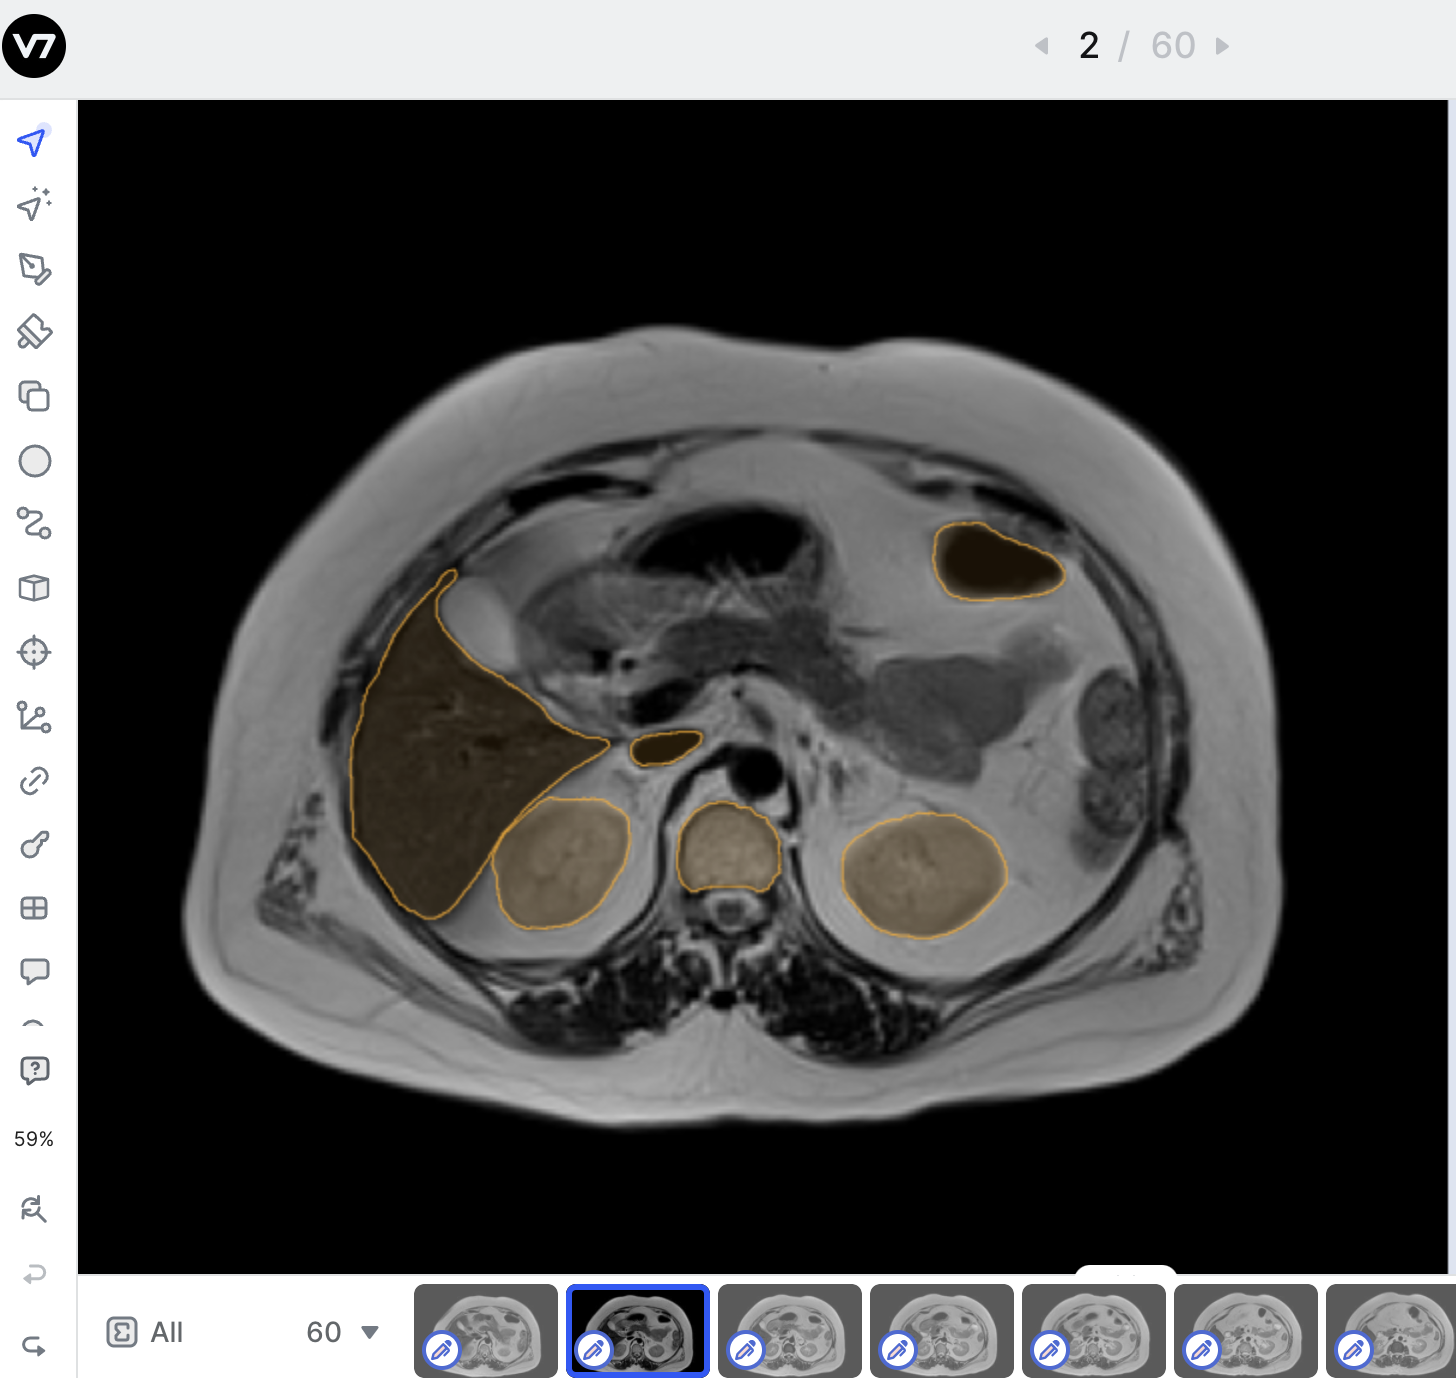
By default, V7 will render the axial plane of any medical imaging file. You can extract axial, sagittal, and coronal views of any file with a DICOM or NIfTI extension by selecting the option to Multi-Planar View upon import.
MPR View SupportIf you don't see the Multi-Planar Viewbutton in the image below please contact Support, or your V7 Contact to check your settings & help you troubleshoot!
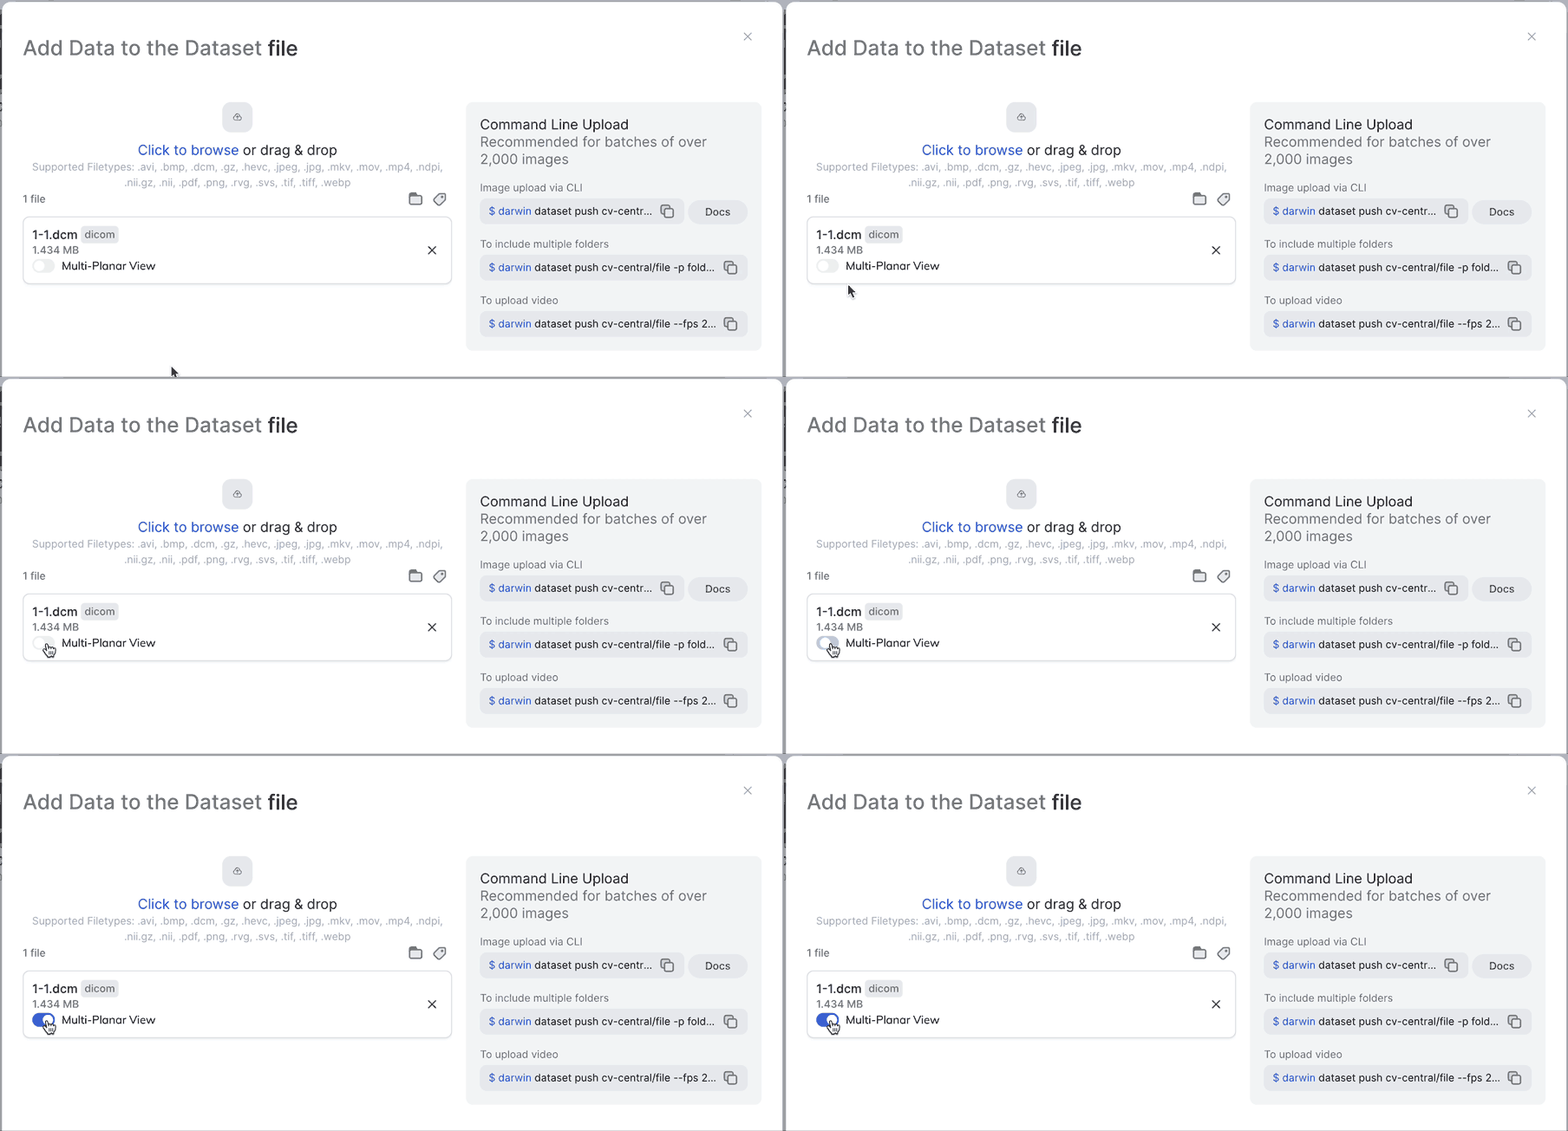
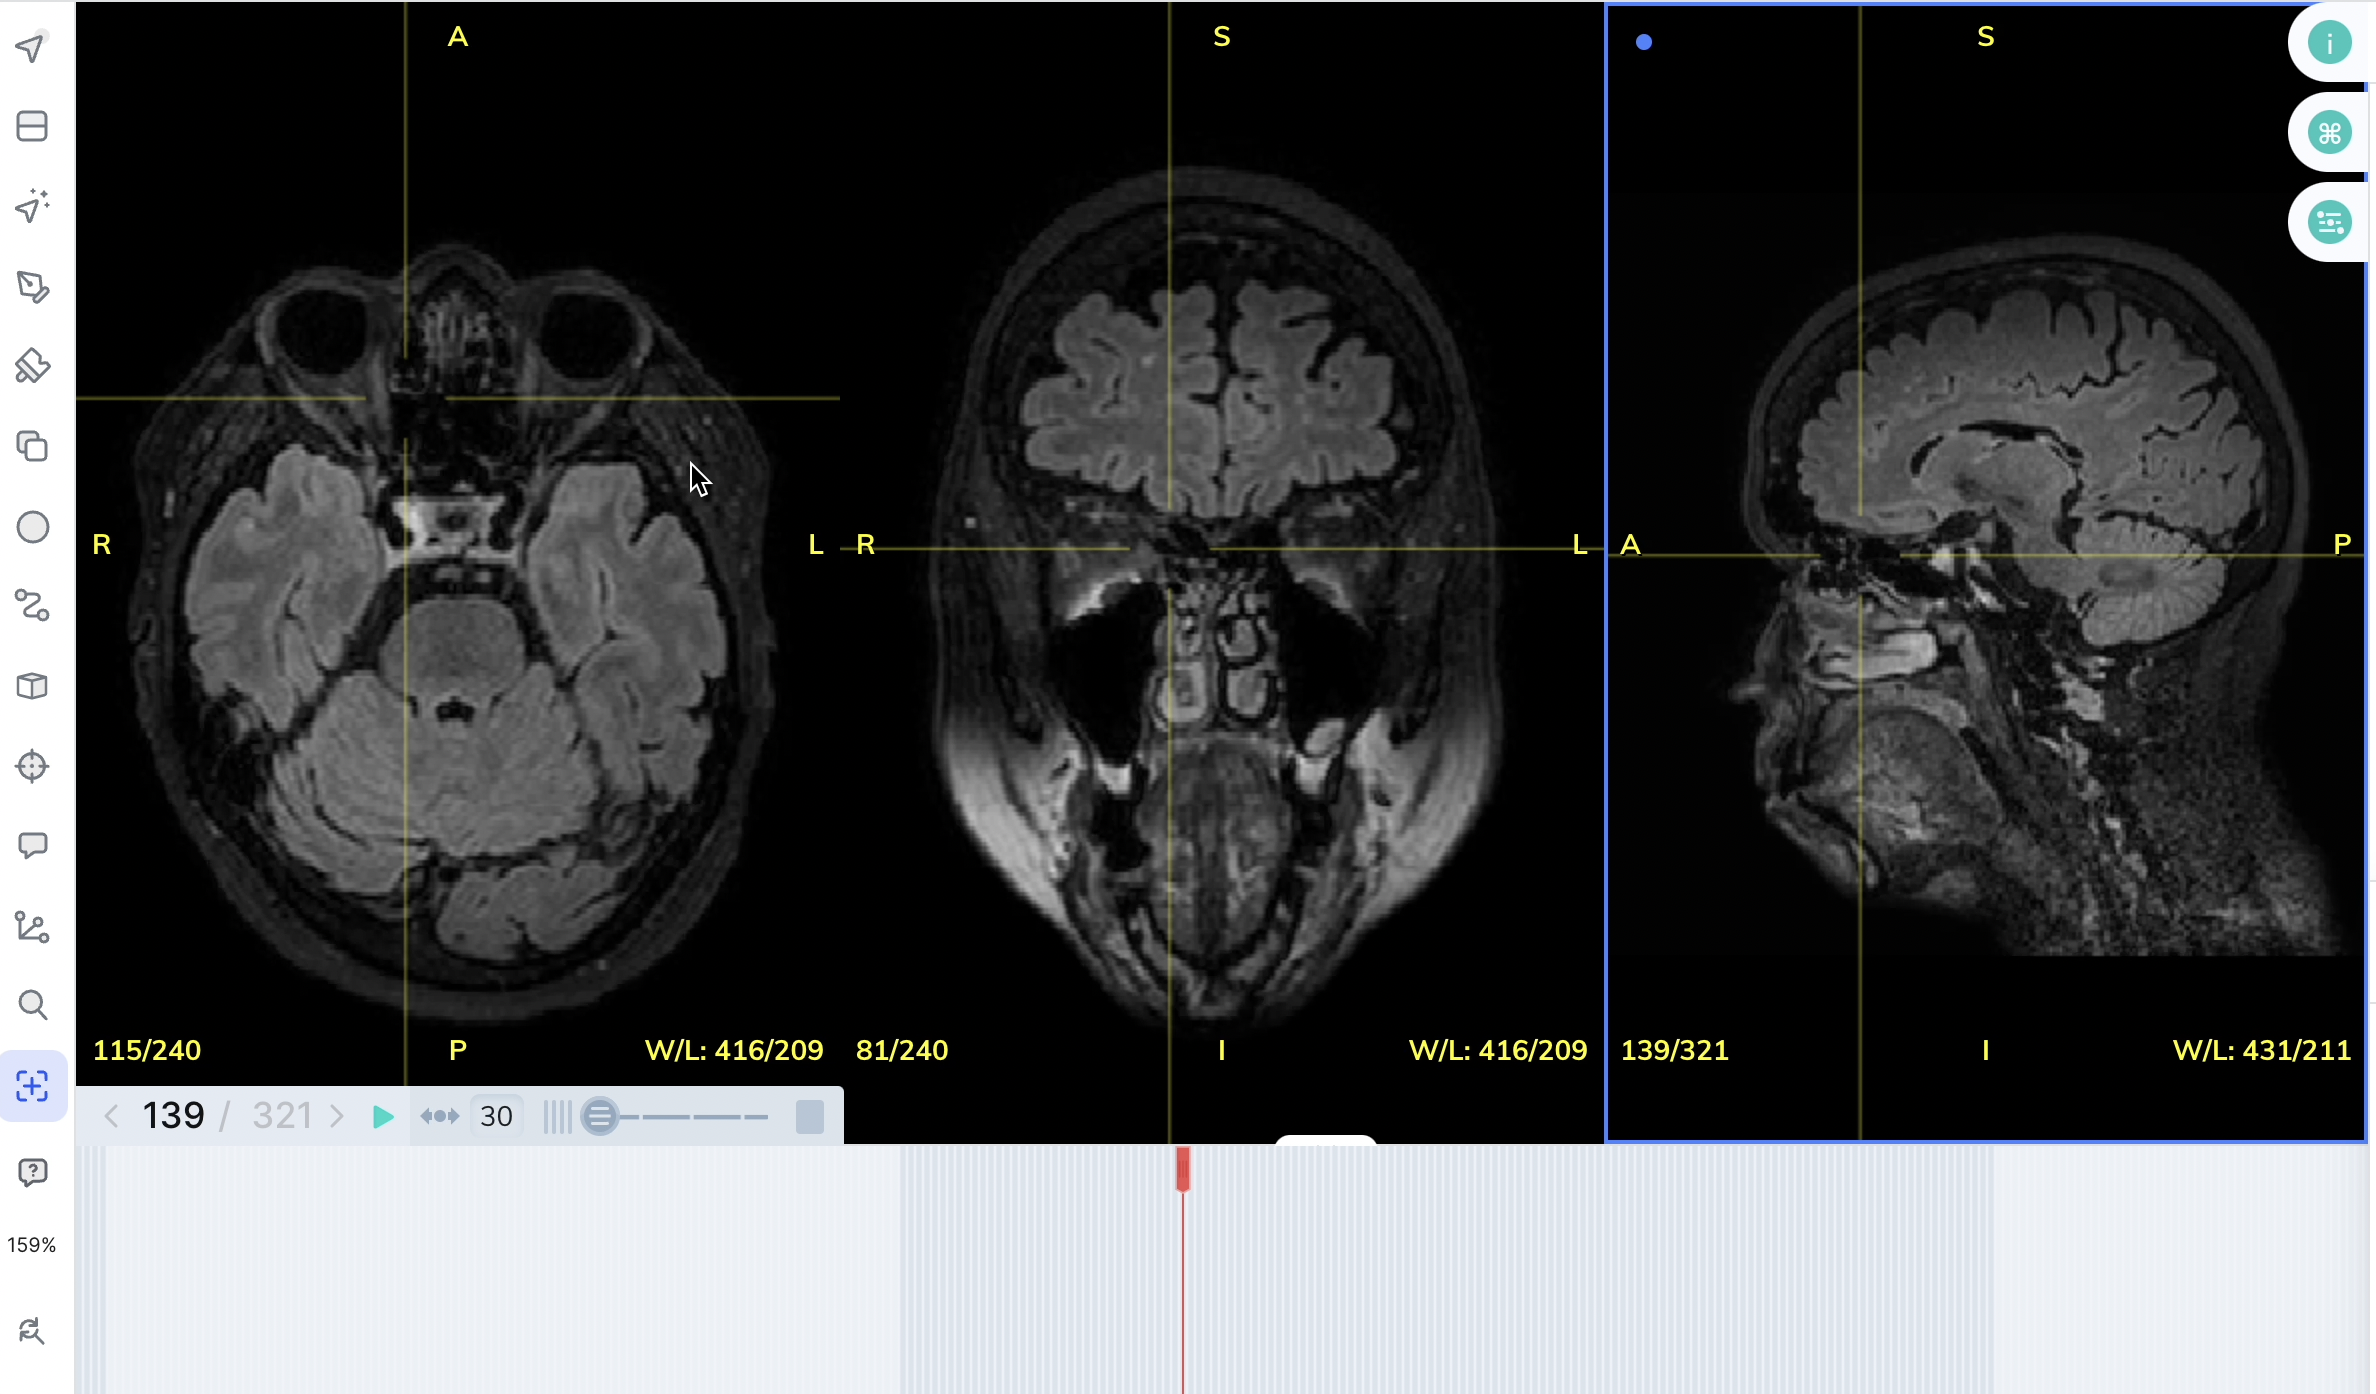
Multi-Planar ViewNot only can you enable Multi-Planar view from the UI, you can also enable it from darwin-py by making sure you use the --extract_views flag when pushing to a dataset. Make sure to specify "slot_name": "0" for this to work.
ExportsTo export annotations made in multiple views we’d recommend exporting in our Darwin JSON 2.0 format (available in teams on the 2.0 version of V7) or in the NIfTI format. In Darwin JSON 2.0, annotations from each plane will be saved in separate slots, in NIfTI, exported annotations can be viewed in external 3D NIfTI viewers.
Set window levels, create presets, and apply color maps
Equip the Window Level Tool (W on your keyboard) and move your cursor from side to side to adjust the Window and up and down to adjust Level in a given view.
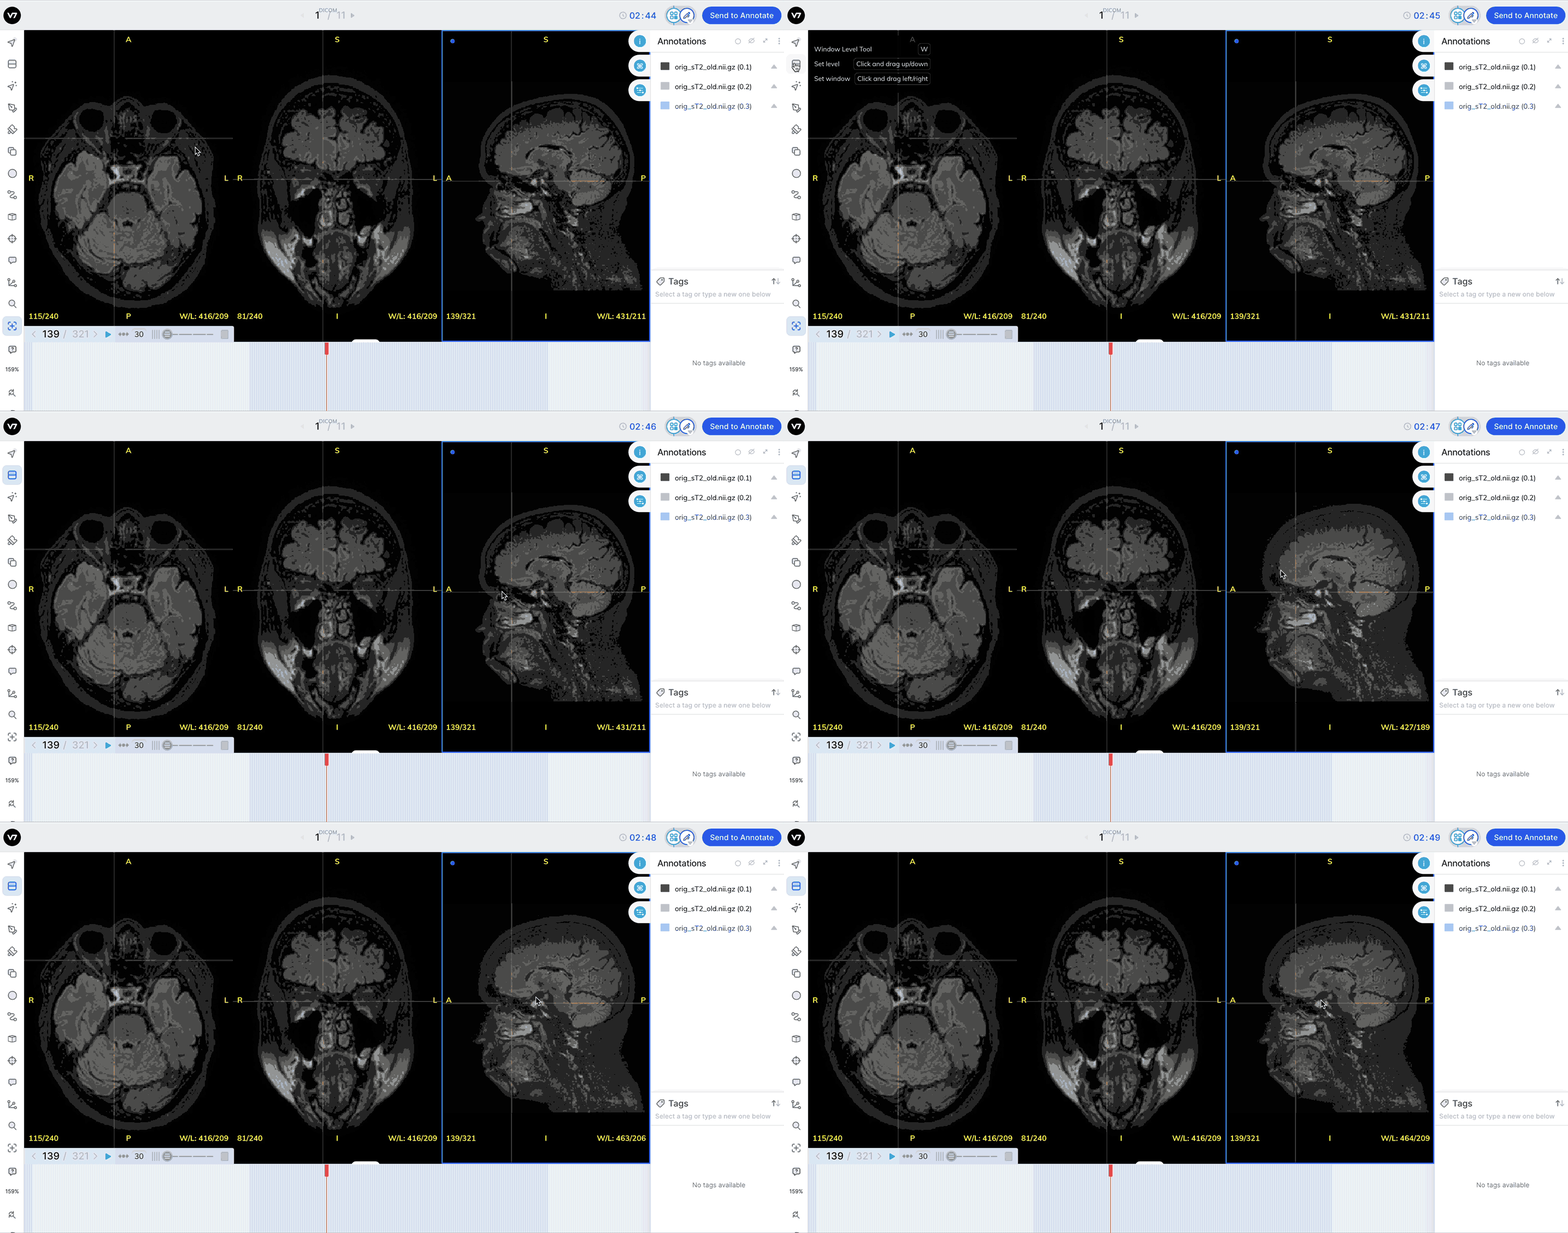
Window levels will appear in the bottom right of each plane. You can open the Image Manipulation panel to review and manually adjust window levels.
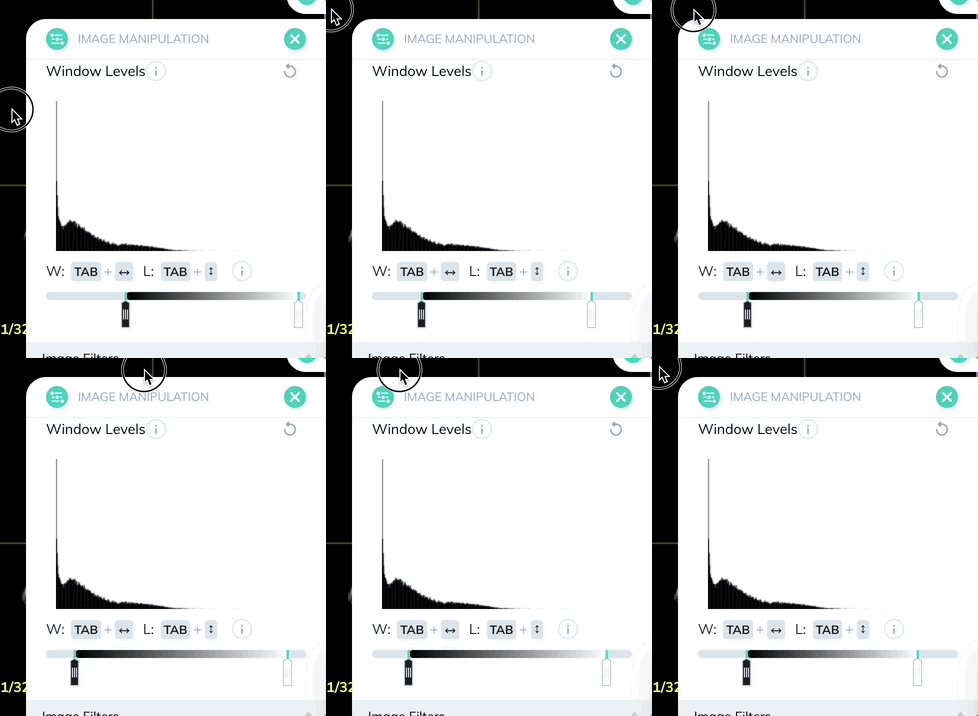
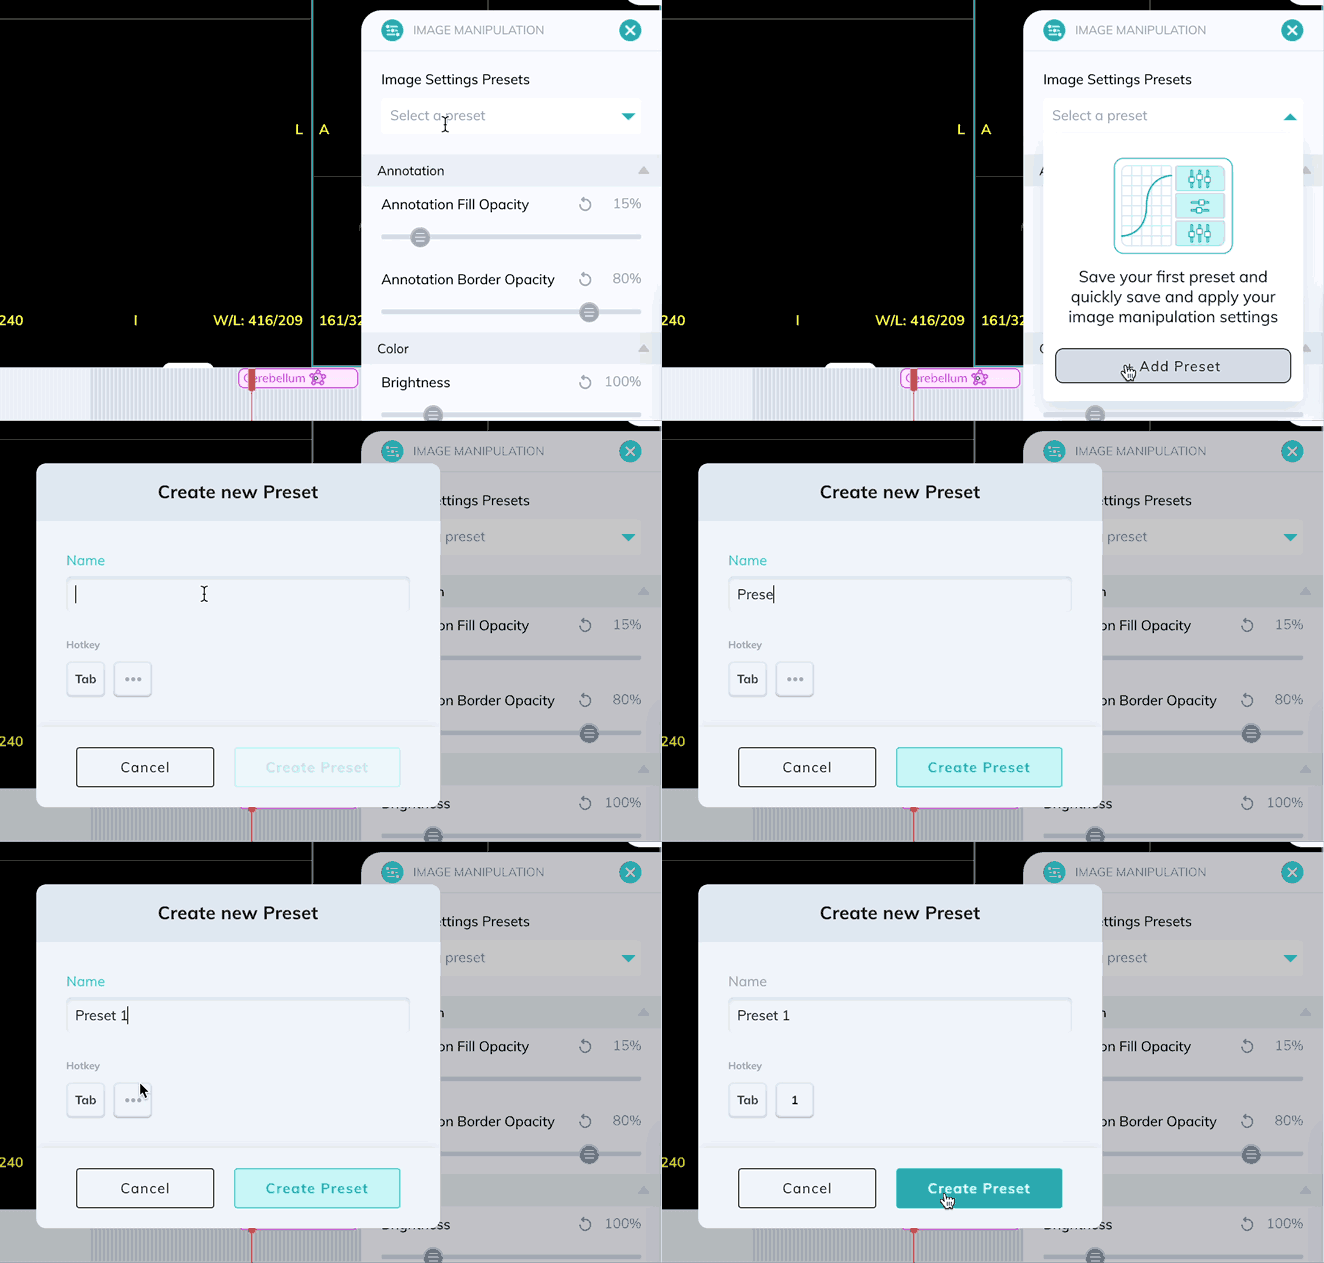
Window levels can be saved as presets which can be quickly enabled with a custom keyboard shortcut. Once you have your window levels right where you want them, add a new preset in the Image Manipulation panel.
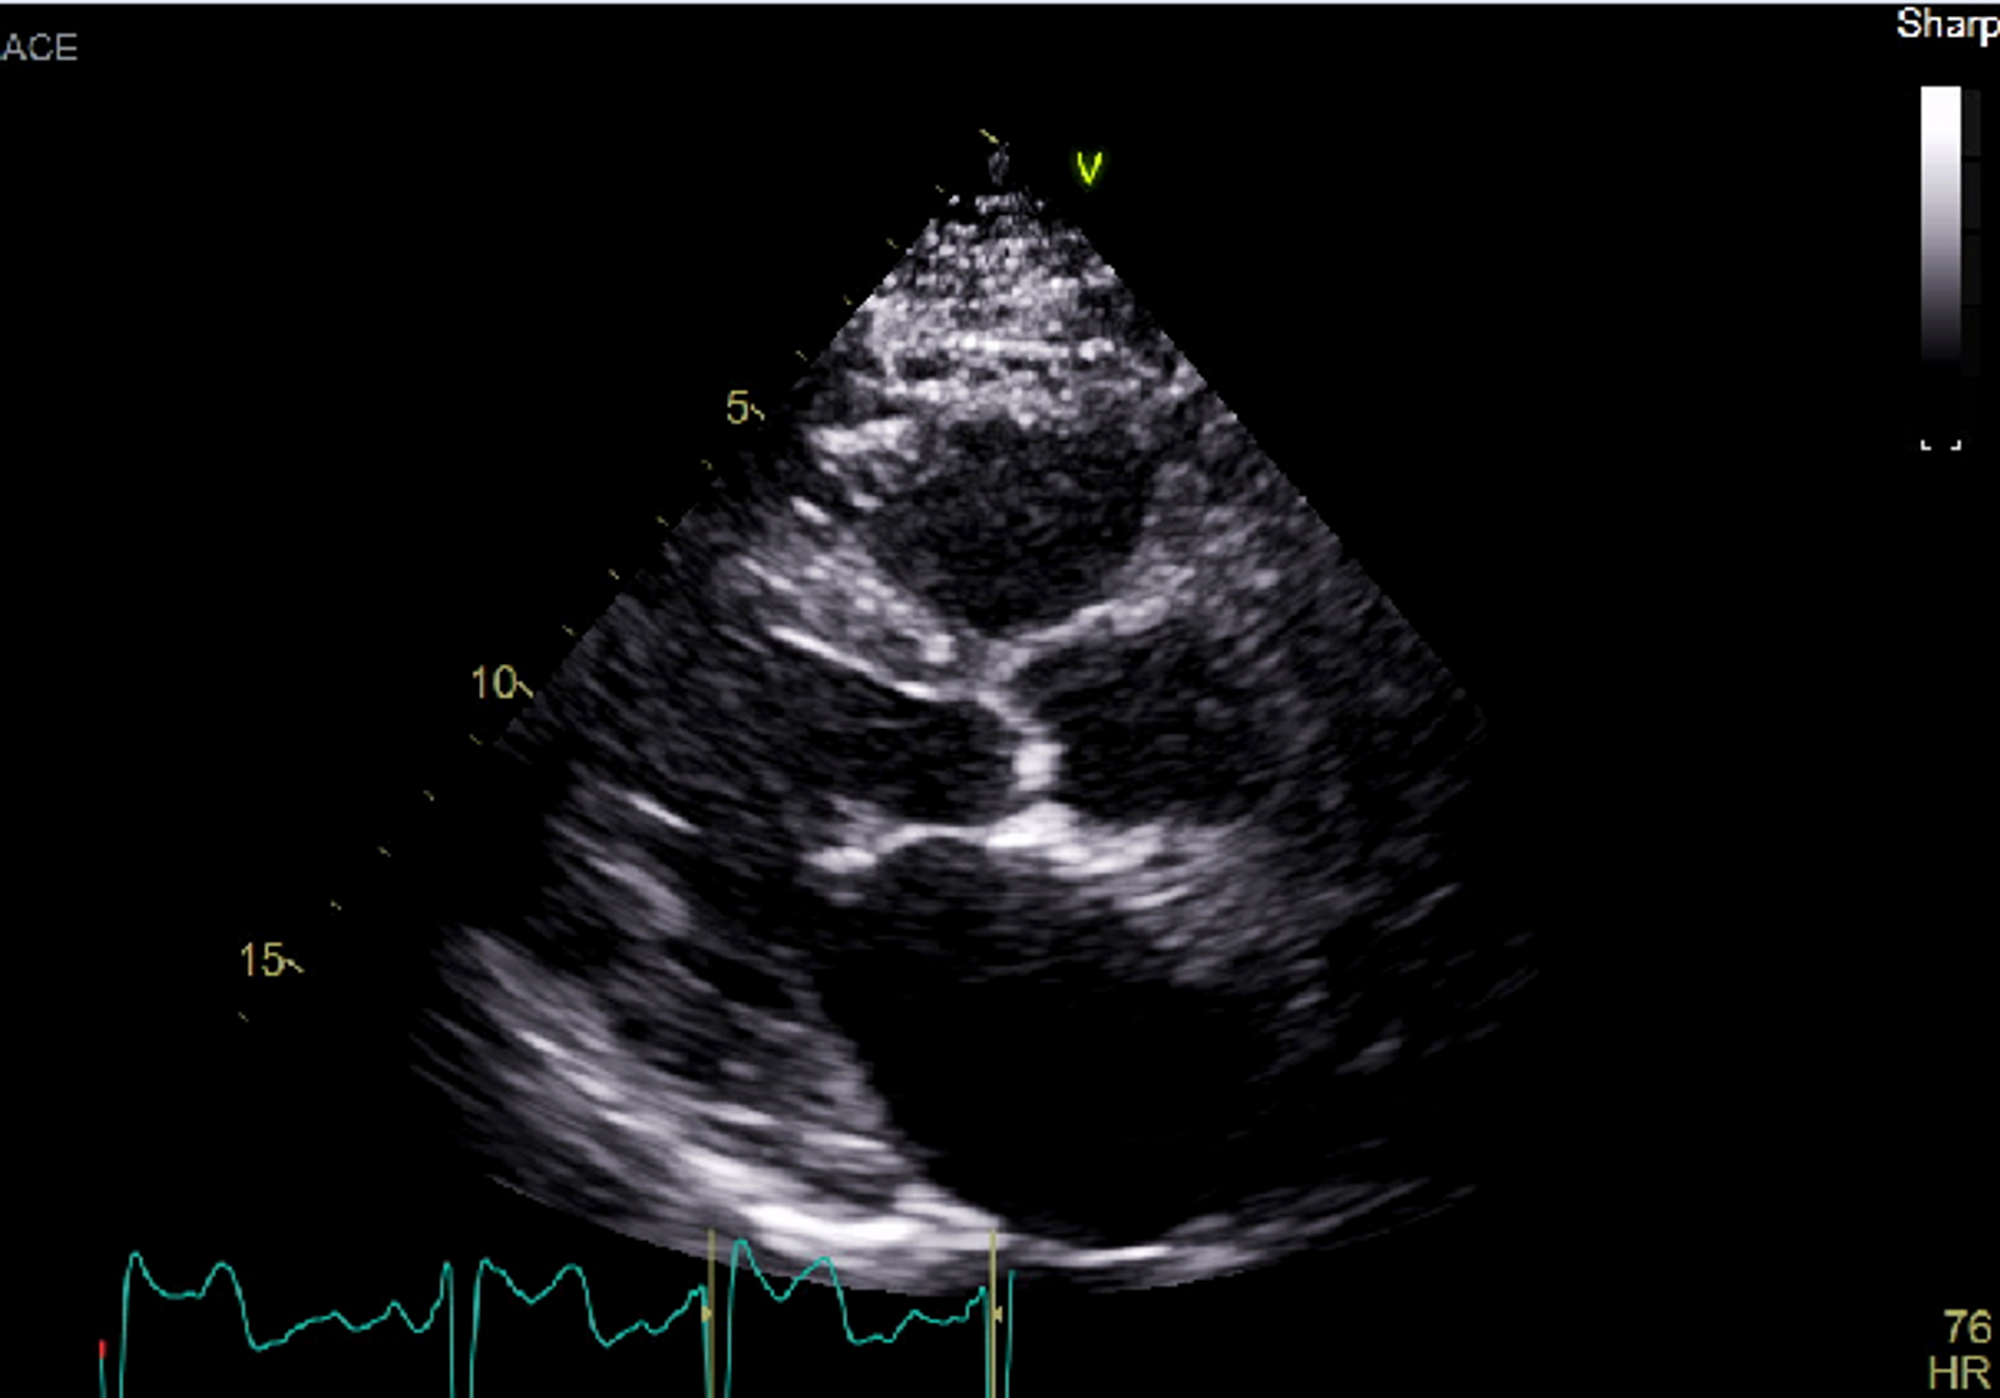
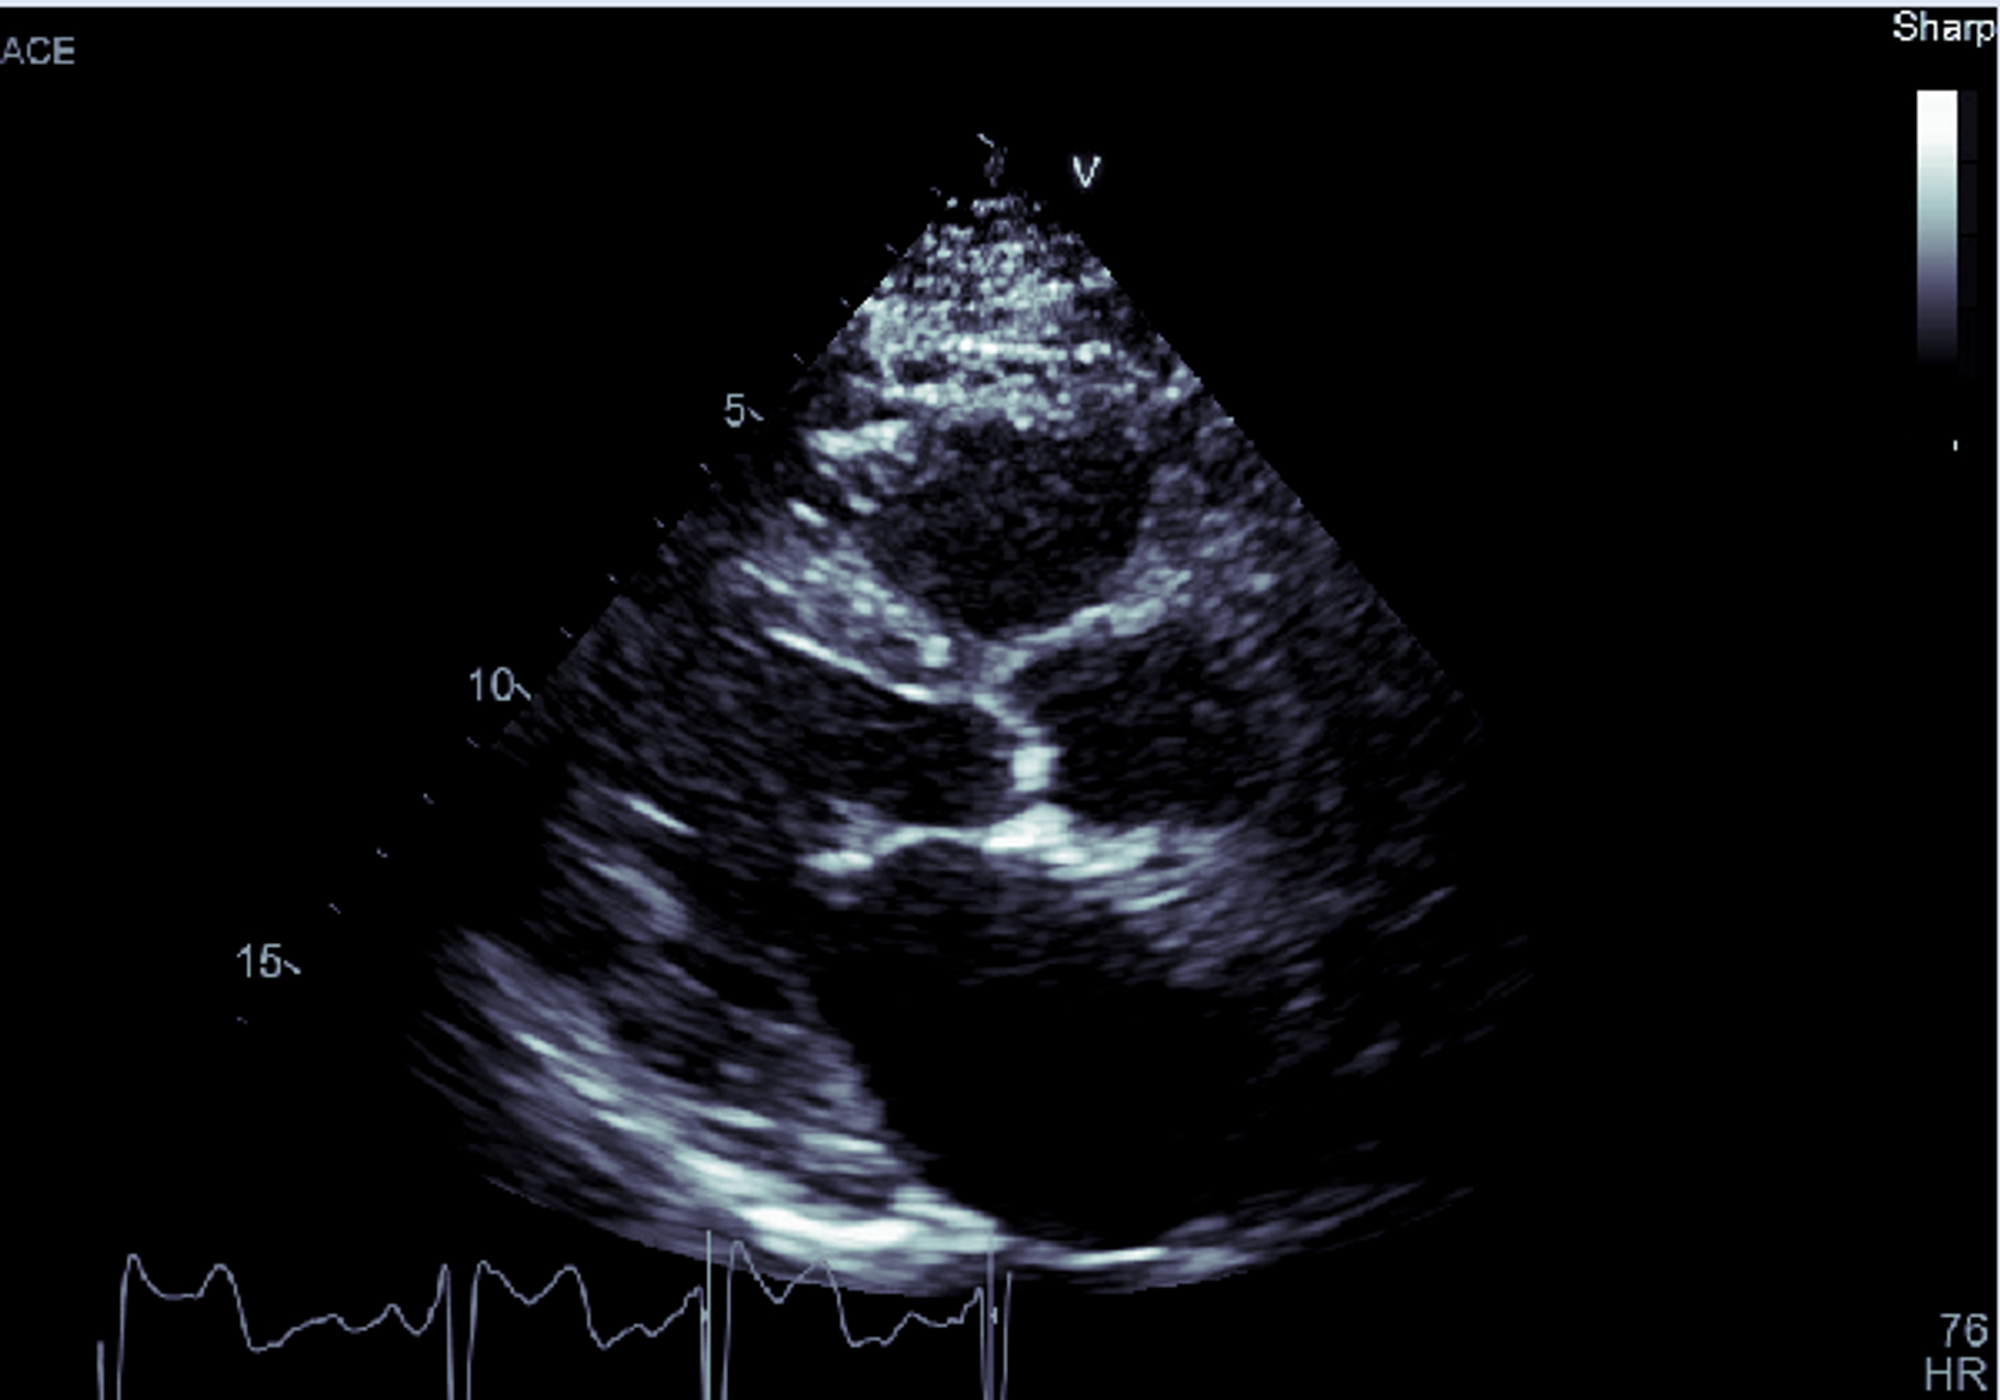
You can also use the Image Manipulation panel to apply color maps to your series. Let's take a look at an ultrasound image with the different color maps applied.
Here it is in the default Raw format:
Now here it is with the Bone color map applied:
And here it is with the Jet color map:
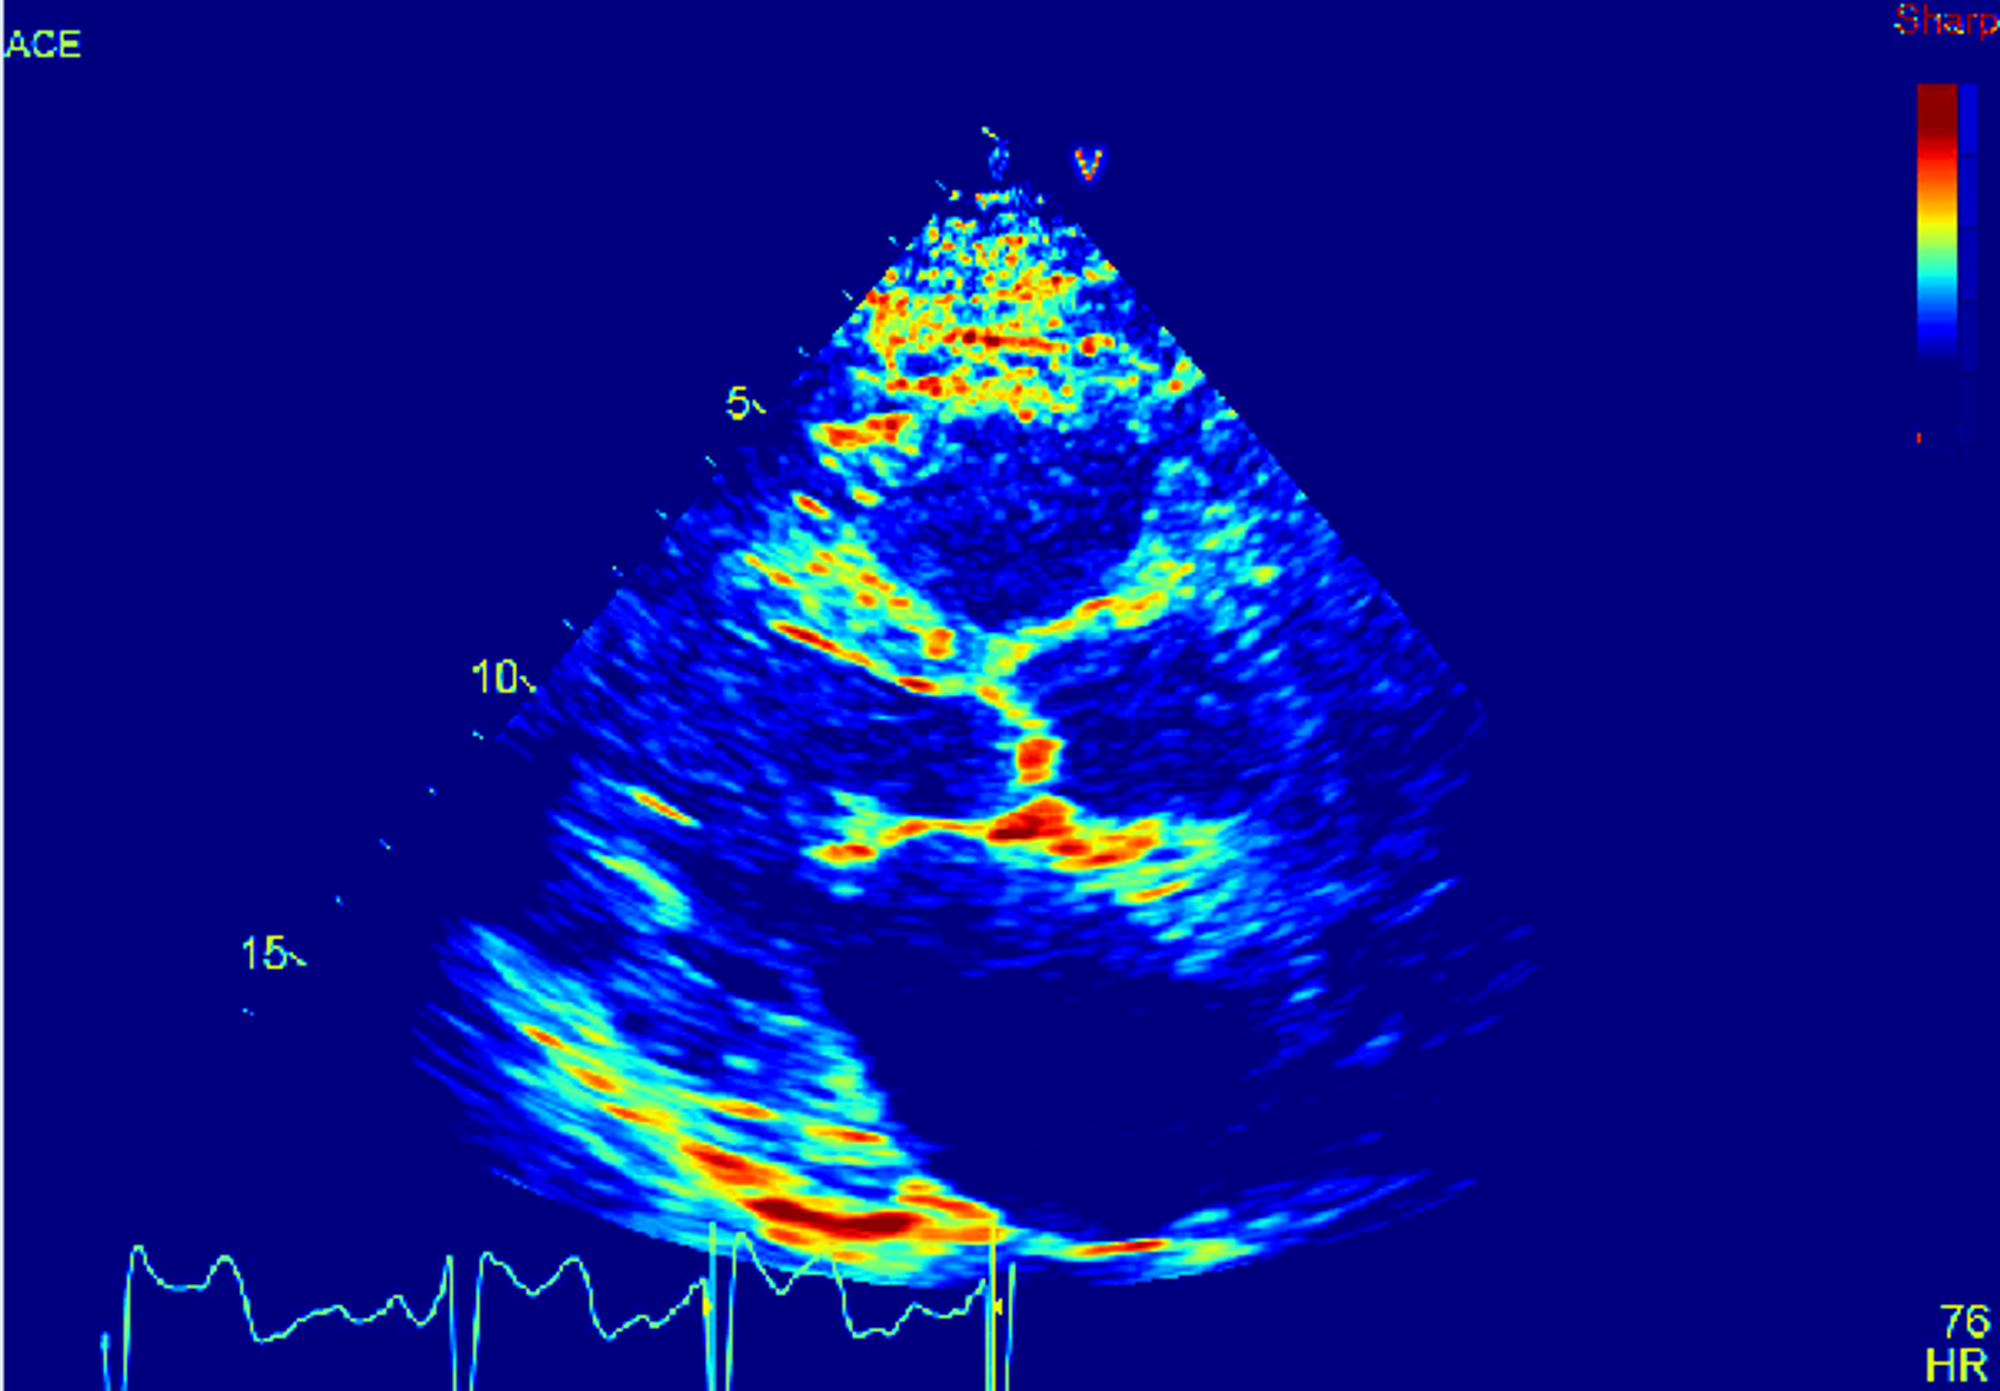
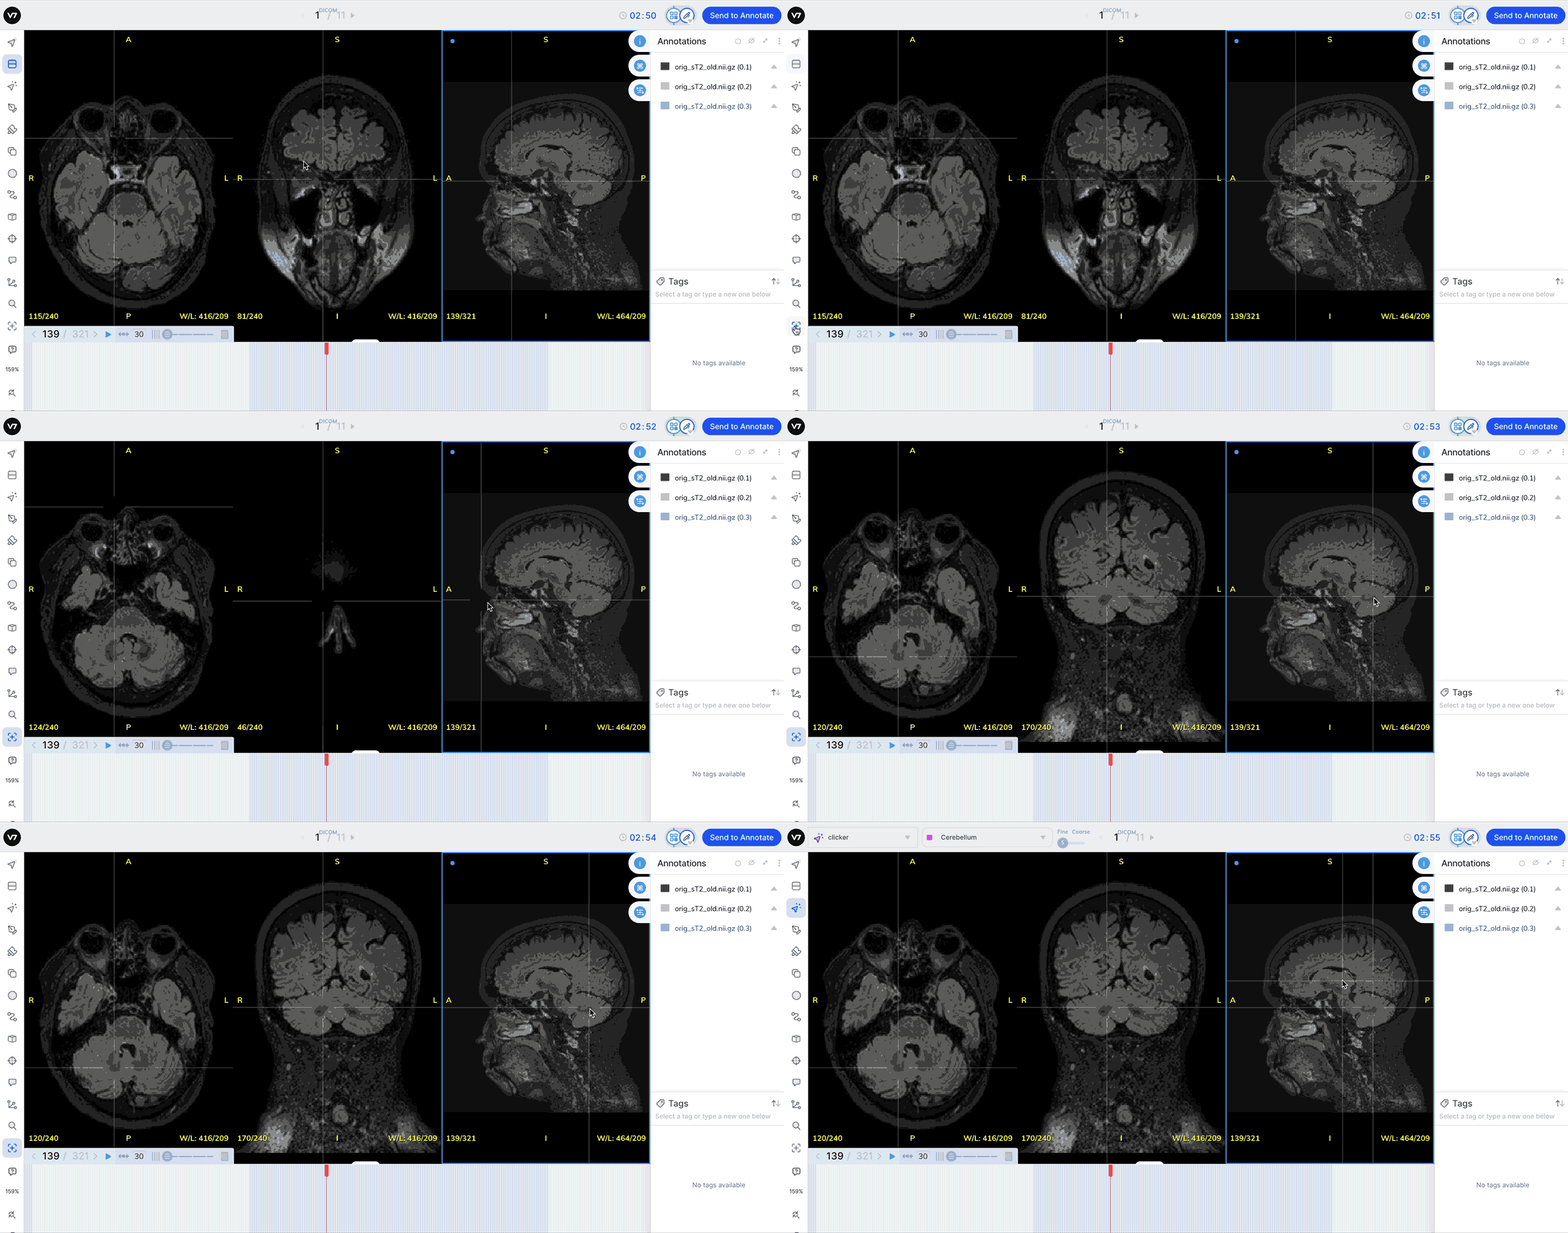
The Crosshairs tool
Equip the Crosshairs tool (R on your keyboard) in files multiple views and click on a region to snap all three views to a single point in space.
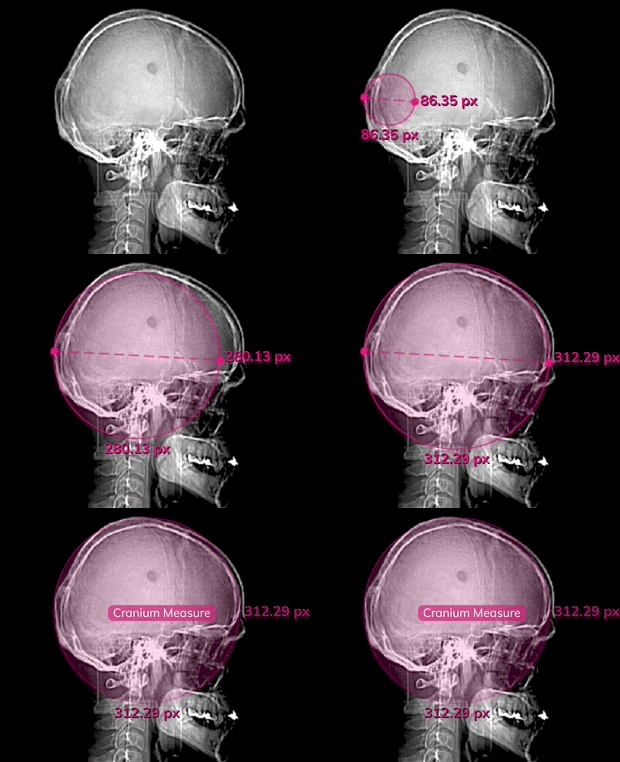
Measures
Click the Measurements toggle in the Annotations menu, or hit Ctrl + M to display the pixel measurements of each label in in an image or series.

Auto-annotate
Our most powerful annotation tool, Auto Annotate, can be used in DICOM and NIfTI files. It works reliably in X-Ray, CT scans, and most forms of medical imaging, but you may find that it struggles to correctly segment polygons for soft tissue or objects where there is low degree of contrast between the object of interest and its surroundings.
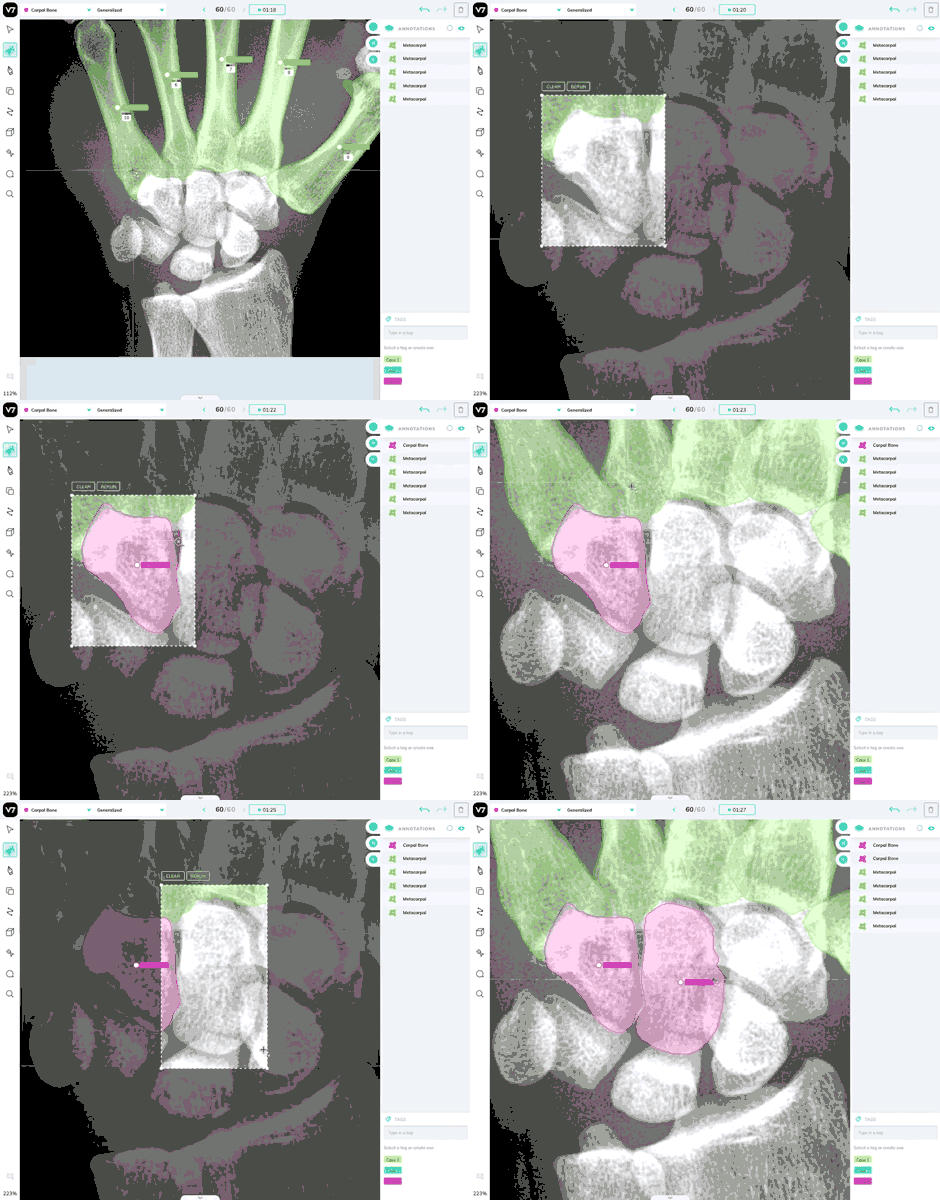
Use the brush tool in any instances where Auto-Annotate is less effective.
Be sure to check out our interpolation and brush tool guides for guidance on how to make fine changes to polygons on DICOM and NIfTI slices.
8-bit vs 16-bit images
16-bit DICOM images are essential for the visualization of medically relevant features often found in gradients.
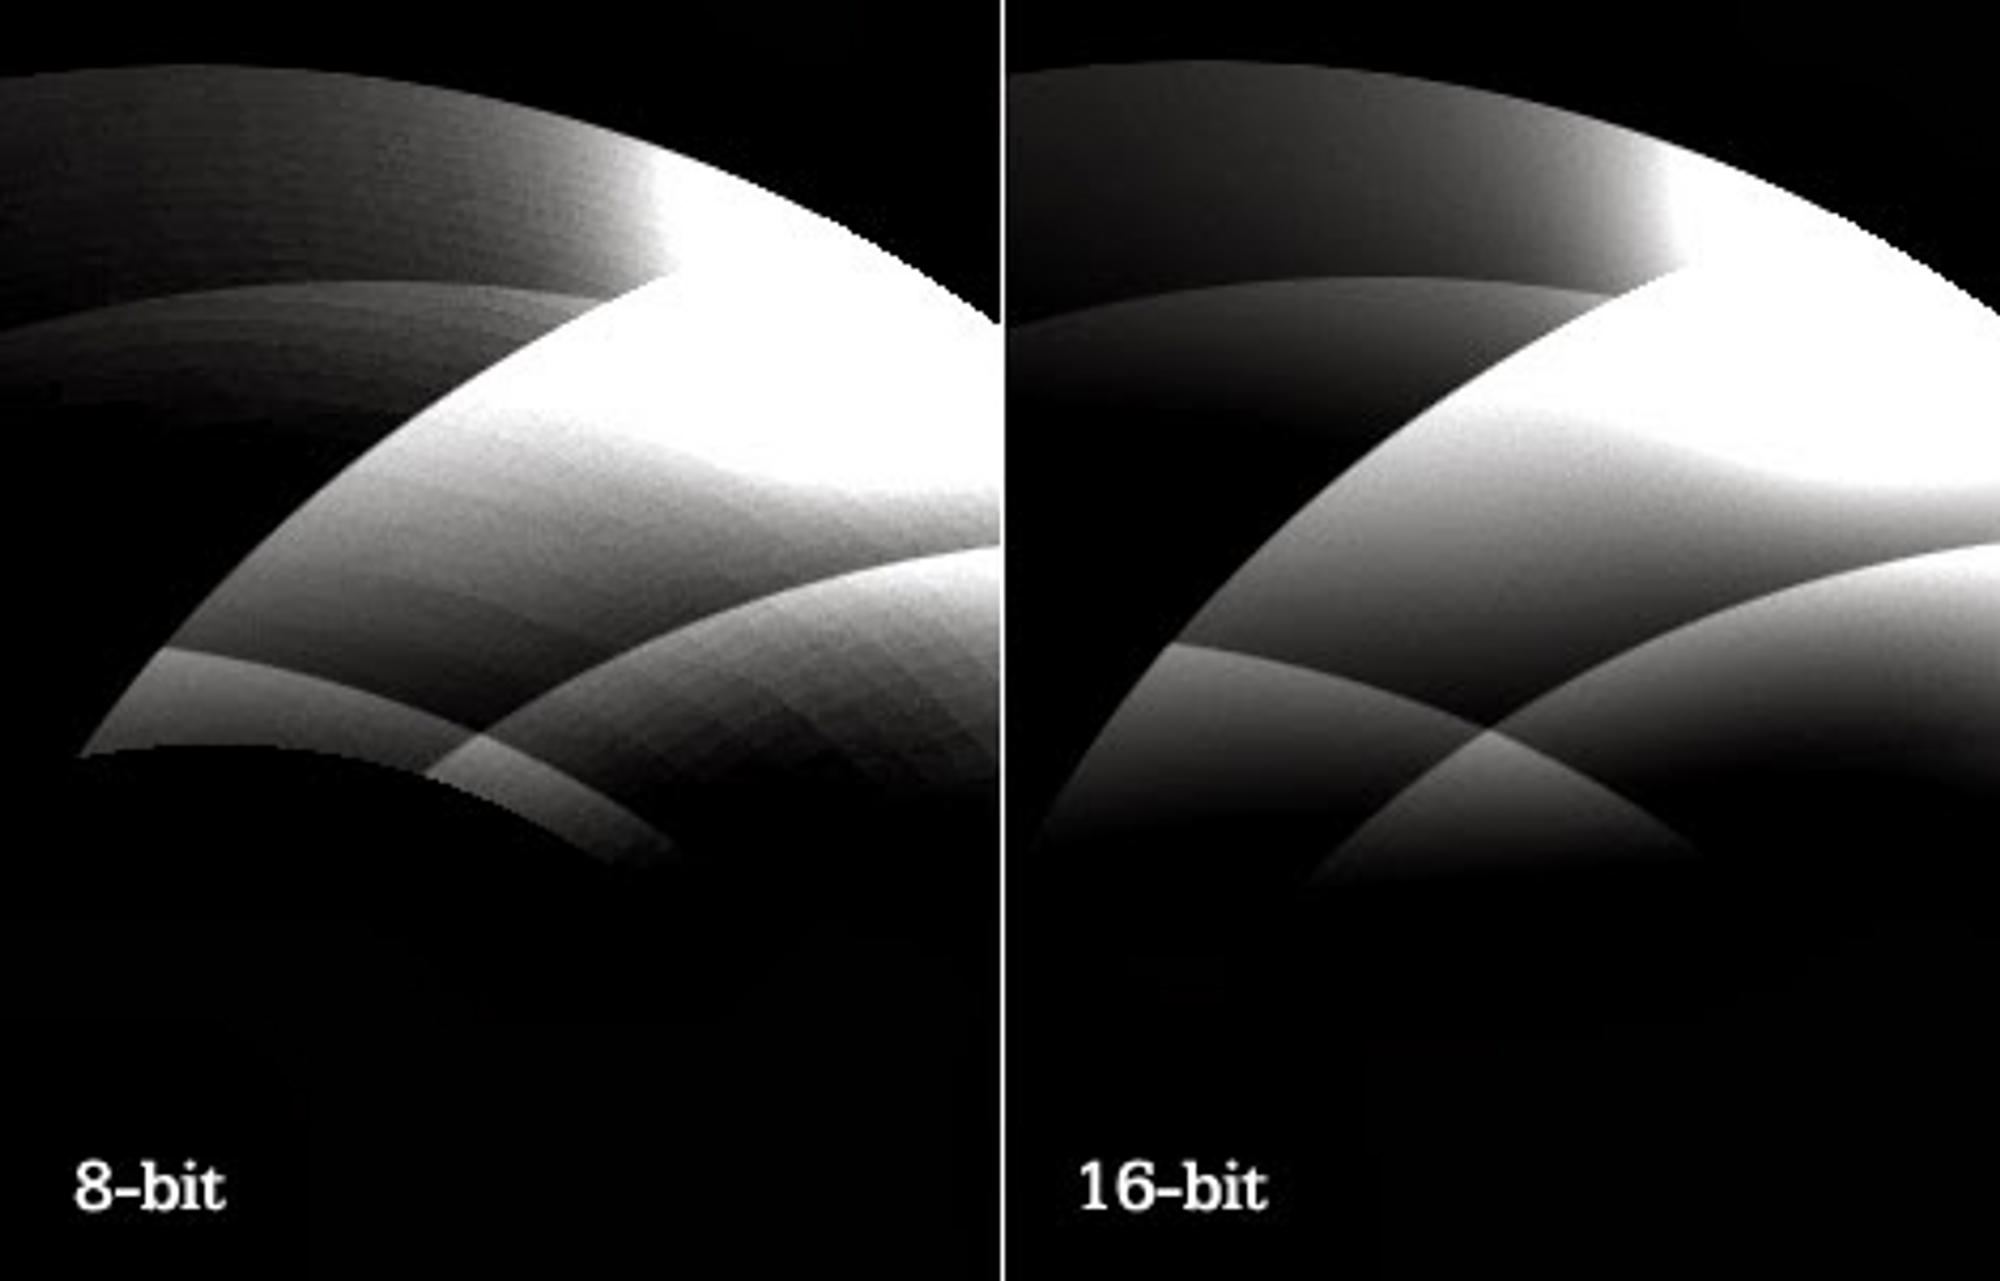
V7 supports DICOM natively in 16-bit. This allows you to view images at their original quality and to use windowing features to see beyond what your monitor is able to display in 250 values per color.
Scaling Coordinates in Medical Data Exports
As of Q4 2024, medical file exports that include "handler": "MONAI" are provided in millimeter space. When plotting annotations outside of Darwin, coordinates must be scaled using the pixdim values in order to match what is displayed in-platform. Without applying this scaling step, annotations may appear misaligned when plotted in pixel space.
Updated 5 months ago
