Video Labeling Guide
This guide is designed to help you annotate videos more efficiently, making use of our advanced technologies to speed up your workflow without compromising on quality. Whether you’re experienced or new to video annotation, you’ll find useful tips and step-by-step instructions to enhance your use of V7’s features. Let’s get started and see how you can improve your video annotation process with our tools and AI support.
The Video Timeline
Basics
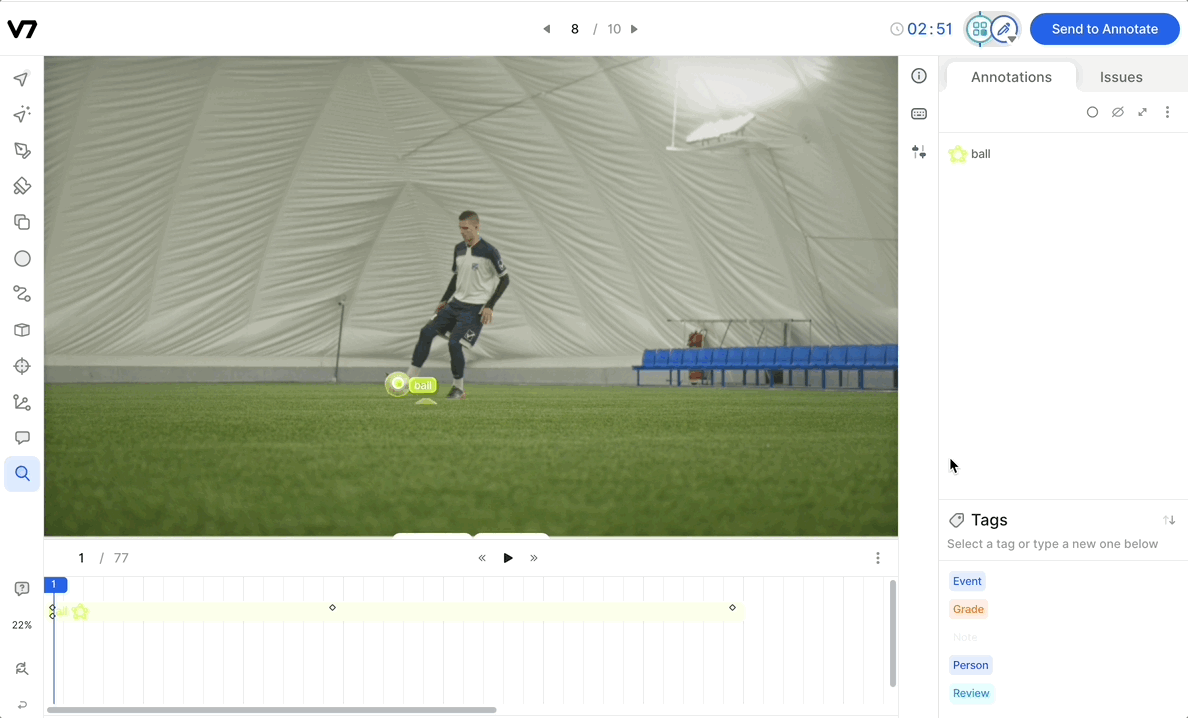
Before laying down a single annotation, let’s start by taking a look at the Timeline:
Each label created in a video will be created as a segment that sits across one or more frames in the timeline.
Open the hamburger menu in the top right of the timeline to reveal the timeline zoom settings and set the default annotation length - this will determine the default frame length of each of your labels. Once created, labels can be extended with a click and drag:
You can also easily change the start and end frame of an annotation by using the right click menu:
And adjust the playback speed:
Key Frames
Keyframes are created on the first frame of any label, and any subsequent frames where an edit is made. Changes to subannotations (like Properties or Instance IDs) will also display as a keyframe in the bottom half of a label.
Timeline Summary Mode
The Timeline Summary Mode in V7 provides a high-level, read-only overview of your video annotations—perfect for quickly reviewing annotation coverage and navigating large files.
- Access it via the button on the right-hand side or with Shift + D.
- View a heatmap showing annotation density across the video.
- Annotations are grouped by class, with expandable sections for deeper inspection.
- Click or double-click annotations to jump to them in the timeline.
- While the summary timeline itself is not editable, you can still make changes in the canvas and layer bar.
- Keyframes and details are hidden to maintain a clean, scannable view.
Audiowave
Video files that are imported with audio will include the audio on playback. You can also use our audiowave feature to visualize the audiowave in parallel and assist the labeling process. The hotkey to show the audio waveform is Shift + A.
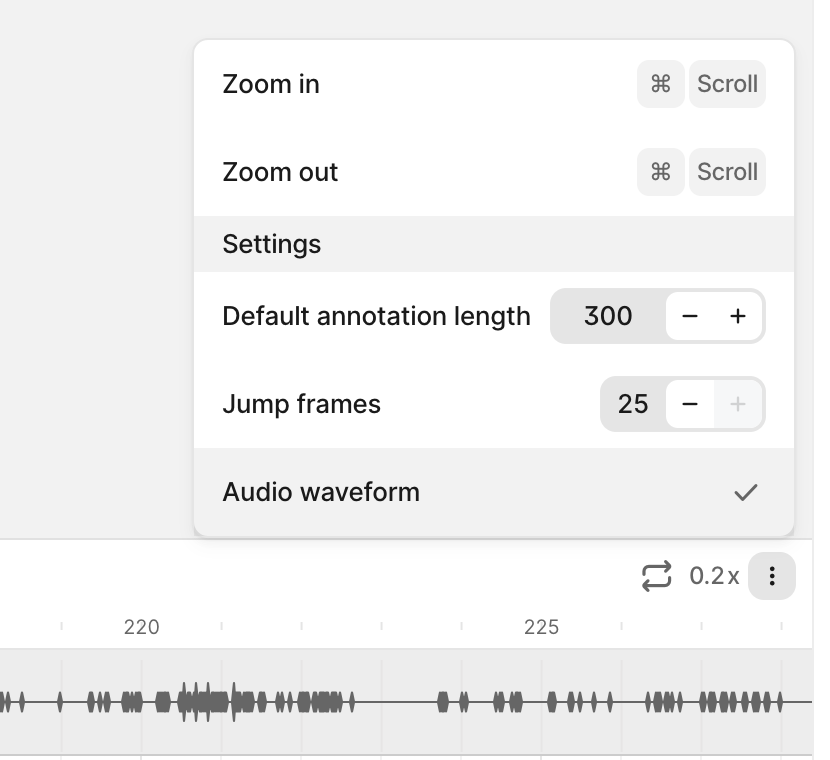
This is especially helpful for use cases where you are labeling or classifying things present in the audio - such as speech. If you toggle on the audiowave, but it says "Audiowave not found" then please re-upload your file. Videos need to be re-uploaded after the feature is enabled.
Automated Segmentation
Auto-track
Check out our Auto-Track guide here for an in-depth look at how you can use Auto-Track to automate the bulk of your video labelling.
For the vast majority of segmentation or object detection tasks, AutoTrack will be the fastest way to create annotations.
AutoTrack works with both polygons and bounding boxes
Auto Annotate
Check out our Auto-Annotate guide here for an in-depth look at using Auto-Annotate in images and videos.
Auto-Annotate can be used on its own, or in conjunction with Auto-Track. We’d recommend creating initial annotations or annotation edits with Auto-Annotate, and using Auto-Track to complete the bulk of the annotation work in a video.
SAM
Check out our SAM guide here for an in-depth look at using Meta’s Segment Anything Model in images and videos.
SAM can be used on its own, or in conjunction with Auto-Track. We’d recommend creating initial annotations or annotation edits with SAM, and using Auto-Track to complete the bulk of the annotation work in a video.
Interpolation
All annotation types in V7 interpolate, saving you the need to annotate each individual frame of a video.
Clicking on a keyframe will reveal the Interpolate toggle, which is turned on by default.

When Interpolate is turned on, V7 will interpolate the changes to a labelled object in the frames between any two keyframes, often eliminating the need to manually edit each individual video frame.
Marking an Object as In/Out of View
To designate an object as no longer visible within the current frame or sequence:
- Select an Annotation: Click on the object's annotation you wish to mark as out of view.
- Mark as In/Out of View: Once selected, you can mark the object as out of view using one of two methods:
- Hotkey: With the annotation highlighted, press the
Xkey to set a segment where the object is out of view. - Context Menu: Right-click on the highlighted annotation and select
Mark in/out of view (X->Y)from the context menu. The "X->Y" notation indicates that using this option creates a segment transition for the visibility of the object.
- Hotkey: With the annotation highlighted, press the
Using Shift+X for Single Frame Adjustments
In addition to the standard view status changes, you can use the Shift+X hotkey for precise control over a single frame:
- Single Frame Adjustment: Pressing
Shift+Xallows you to toggle the view status of an object for a single frame, rather than creating a segment. This is useful for quick adjustments when an object temporarily goes out of view or reappears.
Shortcuts
V7 power users speed up their labeling experience by using our hotkeys. The most valuable hotkeys for video labeling are:
. and , to move between frames
SPACE to play the video
cmd + . to jump forward by a specified number of frames
cmd + , to jump backwards by a specified number of frames
A full list of hotkeys can be found by hovering over the tool icons, or by opening our hotkey menu.
Updated 10 months ago