Use workflows to manage your projects
Behind any well-executed project is a well-structured workflow. In this section, we'll take you through how to add your team to V7, and how to structure each stage of your annotation flow. Finally, we'll take a look at how you and your team can collaborate to complete all of your annotation tasks.

Workflows Overview
Here is an example of a basic workflow. This is the default workflow for all new datasets created in V7; however, you can duplicate an existing, more complex workflow when setting up a new dataset.

In this default workflow template, every file goes through four different statuses (stages):
- Dataset. Freshly imported data
- Annotate. Data is annotated by the annotators
- Review. Annotations are adjusted, accepted, or rejected
- Complete. Annotated files are ready for export or training
In this case, the flow goes from left to right. But it is not really about the position of different stages but the underlying flow determined by the direction of the joints. It is the way the arrows are pointing that matters and not things being up, down, left, or right.
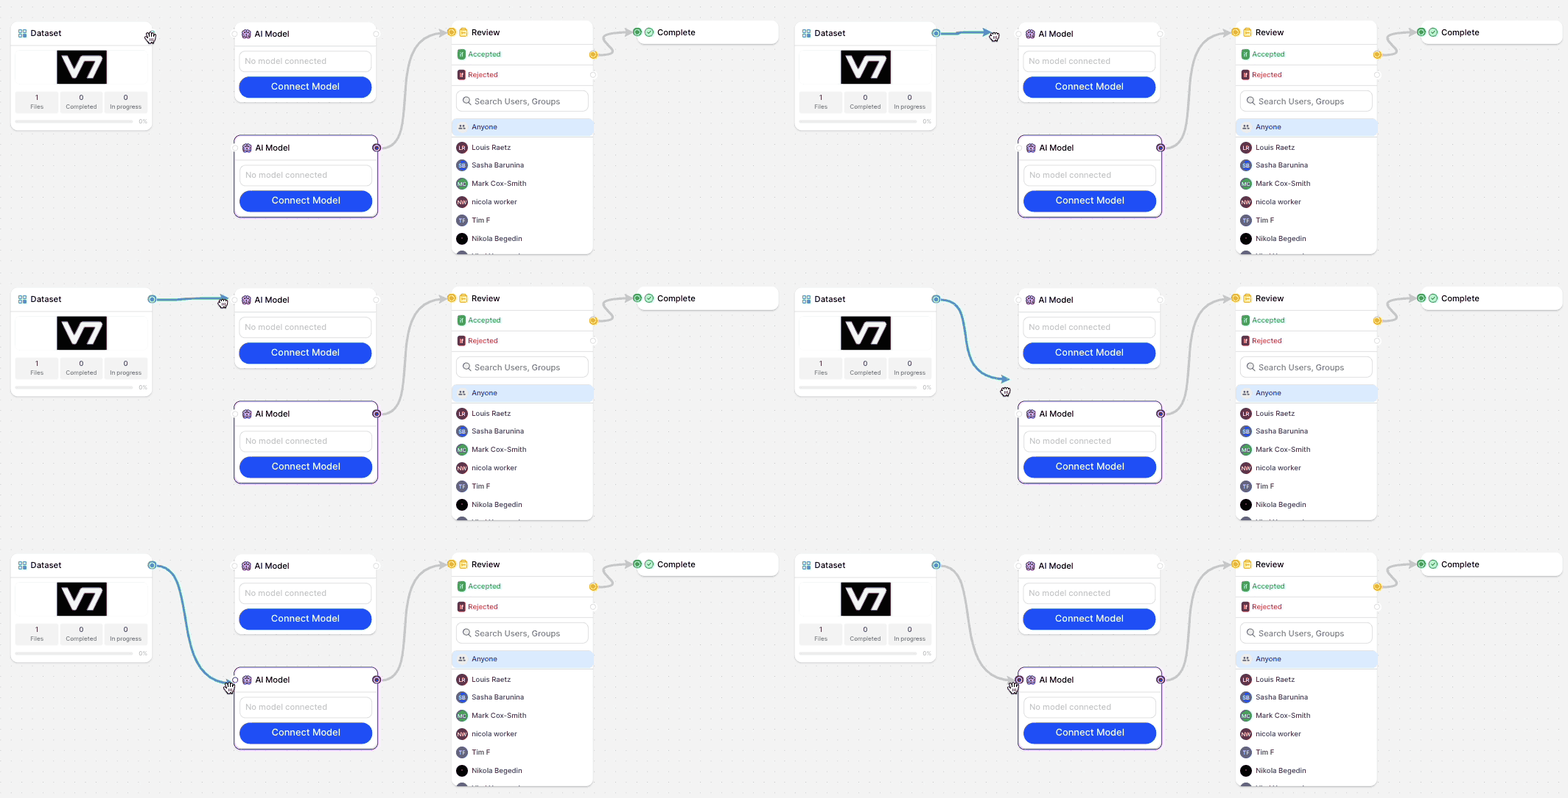
If we were to recreate the basic flow template, we’d have to interconnect the stages manually. We can then explicitly see the direction of our individual connectors.

Notice that files that go through our flow can also move back to previous stages. For example, reviewers can reject an annotation. The image or video will go back to the Annotate stage.
You can simplify your workflows and make them look like this:

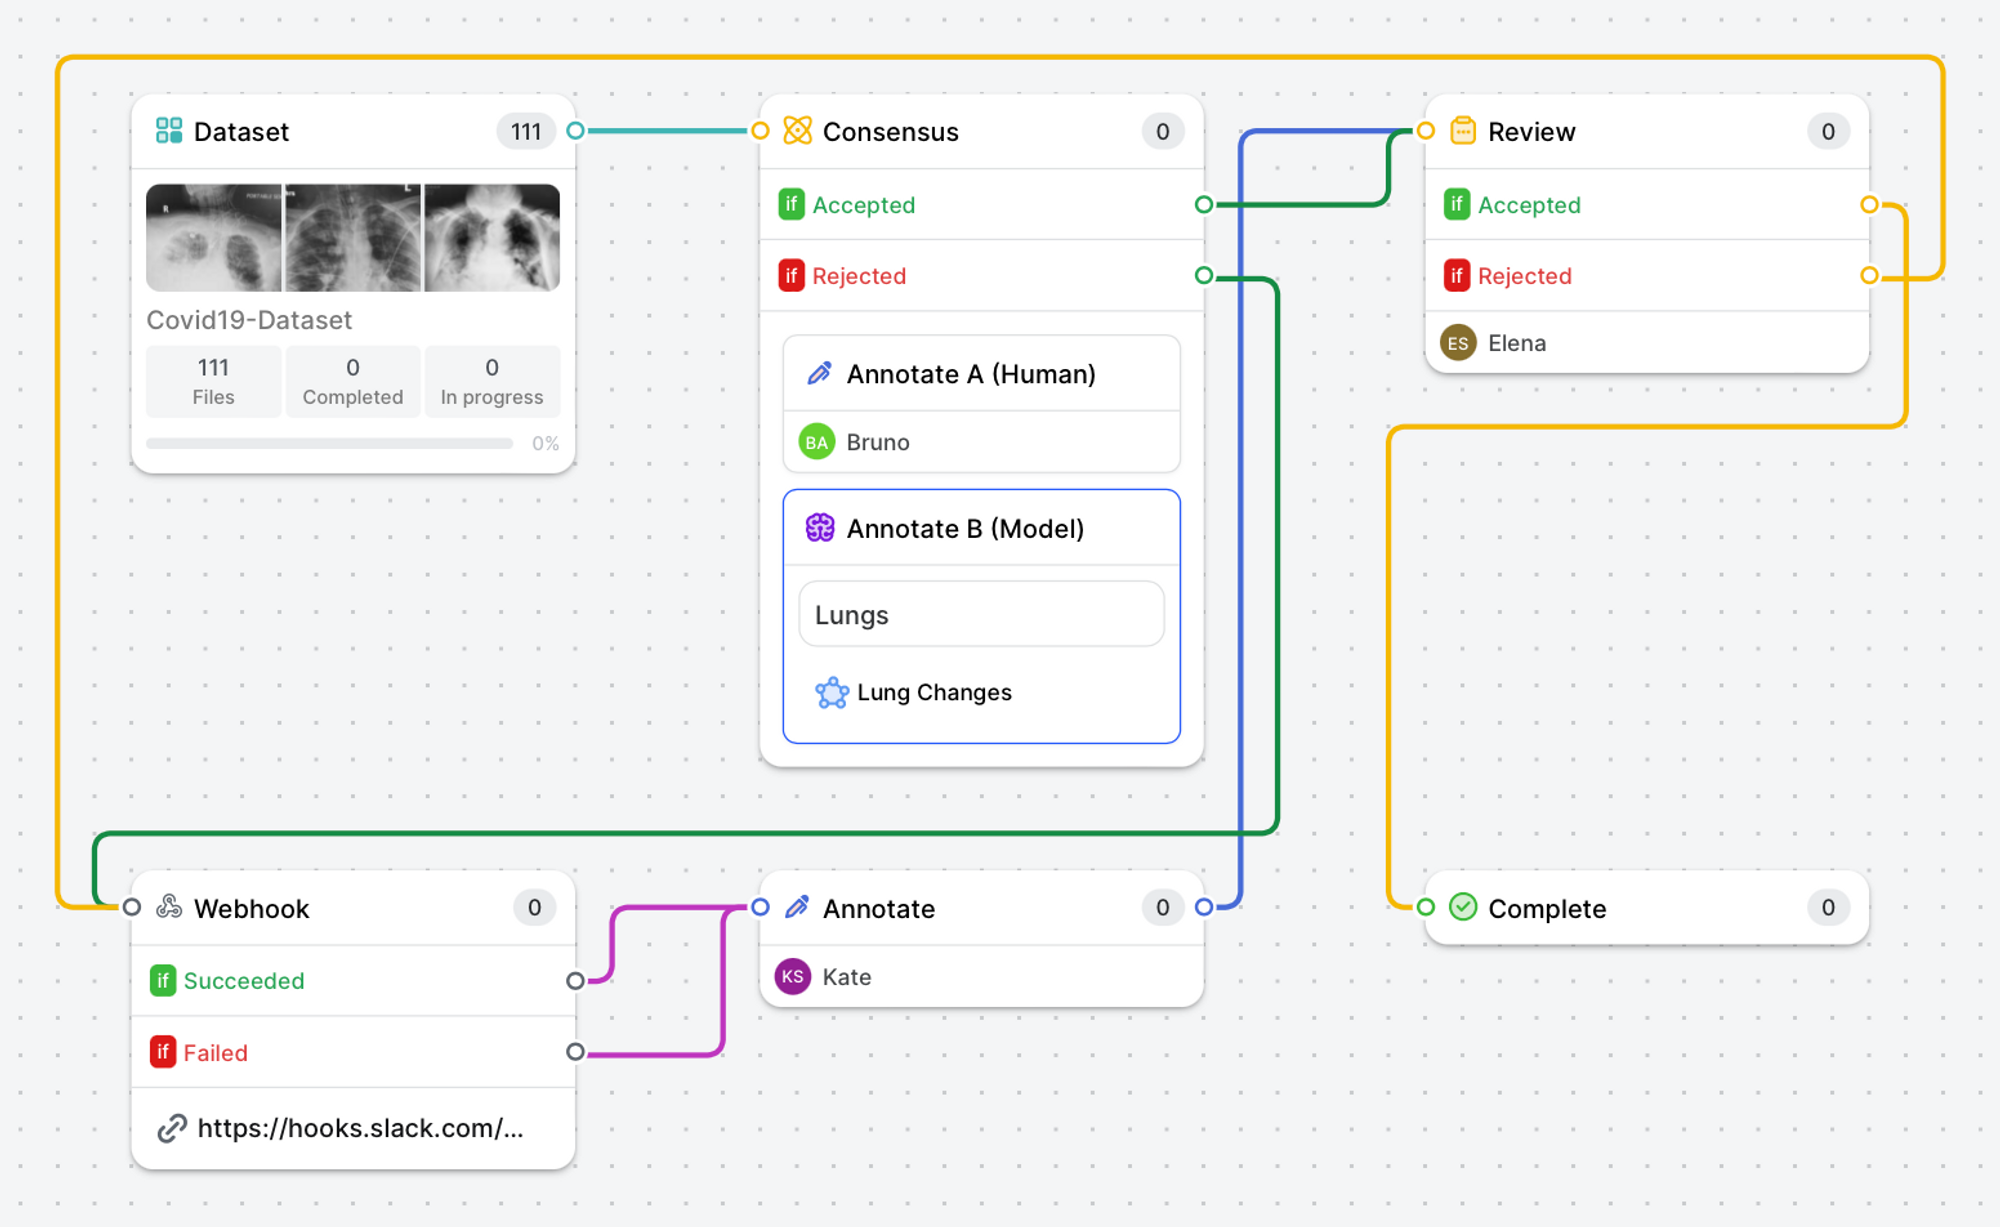
Or you can make them more complex, with advanced automations and custom behavior:

It looks complicated. But it follows a very logical path. We always start with the Dataset stage and finish on the Complete stage.
The advanced flow above uses a human annotator (Bruno) and an AI annotation model. Both annotate the images during the Consensus stage. If there is a 90% overlap between manual and automatic polygon masks, it goes to the Review stage. If there is no consensus or our reviewer, Elena, rejects the annotations, the X-rays need to be annotated by Kate. Every time this happens, Kate receives a webhook-based notification on Slack. The new annotations (updated by Kate) go to Elena for the final review.
Workflow stages
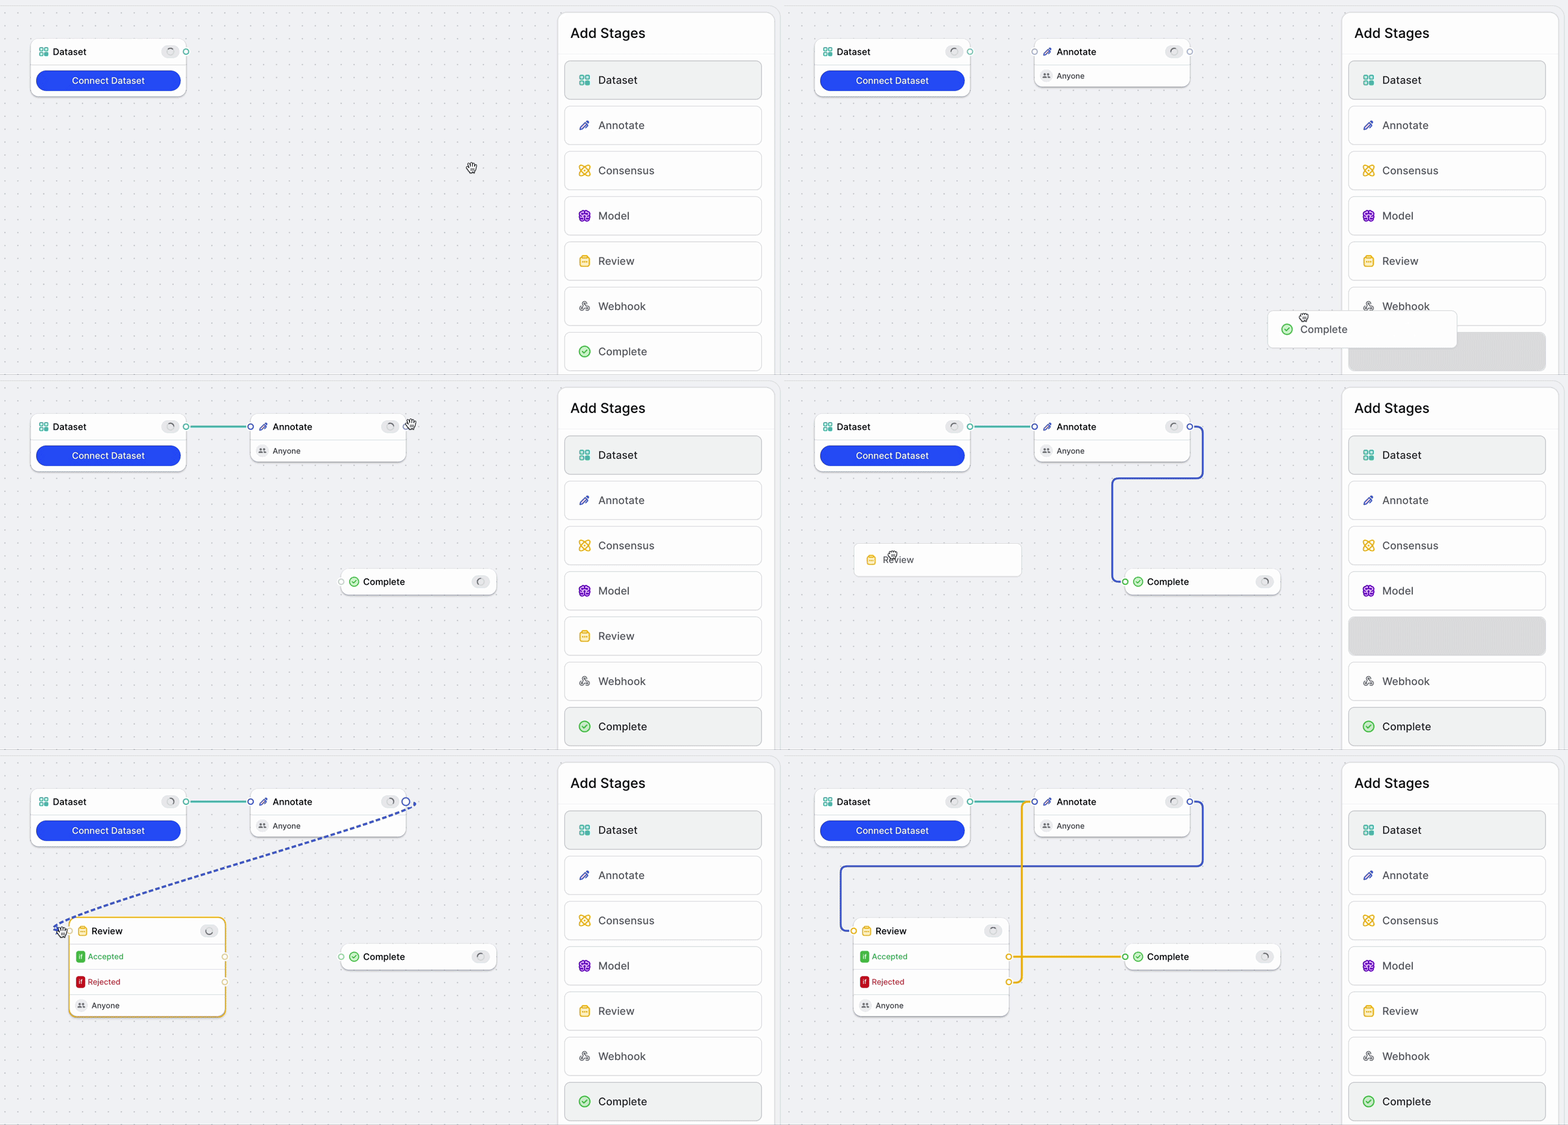
You can design all sorts of custom workflows that suit your unique needs. All you need to do is drag and drop the elements (Stages) of your flow and connect them.

Click on the links below to learn about how each stage works. Each workflow stage plays its own role in increasing the speed and accuracy with which your team can generate training data:
Stage namesYou can rename each individual stage in your workflow. However, some customized names may get confusing after some time. If you are not sure about the function of a stage in your workflow, take a closer look at its icon. They will give you a hint. For example, if you change your AI model's stage name to something like Turbo Annotate 3000, it will still use the purple brain icon.
Updated 5 months ago
