BYOM Setup Guide in Darwin
Guide to Registering External Models through the Darwin UI
V7 now allows you to register your external models through the Models tab from the UI, to more seamlessly incorporate your own models into your V7 workflows for model-assisted labelling or model evaluation. Through the UI integration, the process is simplified as a lot of the manual configuration through the API is removed.
Minimum requirements
Similar to registering your models through the API, these specific requirements need to be met:
- Expect
application/jsonrequest payloads - Respond with
application/jsonresponses - Both request and response payloads must conform to the specific JSON schemas
- Handle
POSTrequests, accepting images as input and responding with the list of results. This can be based on any endpoint you want to choose, e.g./infer.
BYOM Credit UsageBYOM uses the same number of credits as other automated actions like webhooks. There is no server cost. More information is found in our credit usage doc.
Registering the model via the UI
Check Server is RunningYou need to make sure that the server on which your model is hosted on is running and able to listen for requests before the model is registered. For example, with the example model integration shown on the bottom of the page, this code needs to be run before the registration.
Step 1: Prepare web application and necessary functions
In order to be able to register the model, you need to make sure that a web application, such as a Flask app, is set up. This app will be used to define the URL endpoint which is set up in the UI, and able to receive the incoming data.
The communication schema between V7 and your model is outlined in our register the model main doc.
An example code which can be used for handling the inference requests through a Flask App is shown below.
import base64
import tempfile
import urllib

from PIL import Image
from flask import Flask, request, jsonify
from your_model import Model


model = Model()


def resolve_image(image_spec: dict[str, str]) -> Image:
    if "url" in image_spec:
        with tempfile.NamedTemporaryFile() as file:
            urllib.request.urlretrieve(image_spec["url"], file.name)
            return Image.open(file.name).convert("RGB")
    elif "base64" in image_spec:
        with tempfile.NamedTemporaryFile() as file:
            file.write(base64.decodebytes(image_spec["base64"].encode("utf-8")))
            return Image.open(file.name).convert("RGB")
    else:
        raise ValueError("Invalid image spec")

@app.route("/api/classes", methods=["GET"])
def classes():
    return jsonify(model.classes)

@app.route("/api/infer", methods=["POST"])
def infer():
    payload = request.json

    try:
        image = resolve_image(payload["image"])
        class_name, confidence = model(image)

        return jsonify(
            status="succeeded",
            results=[
                {
                    "name": class_name,
                    "label": class_name,
                    "confidence": confidence,
                    "tag": {},
                }
            ],
        )
    except:
        print(traceback.format_exc())
        return jsonify(status="failed", results=[])

if __name__ == "__main__":
    app.run(debug=True, host="0.0.0.0")
Step 2: Deploying the model
To make sure the Flask app is accessible by V7, it needs to be publicly hosted, which can be done for example on an EC2 instance on AWS. This supplies you with a public IP address which is served as the endpoint for the deployed model.
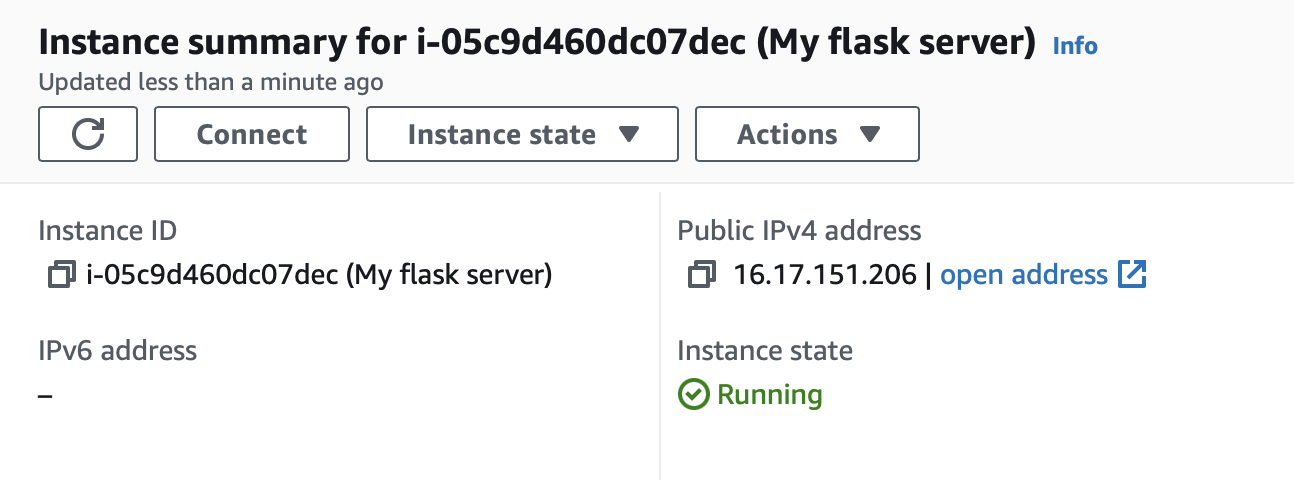
Step 3: Register a new model
This is where the main difference of this feature comes into play. The API code shown in the BYOM register the modelpage, will be replaced by the below.
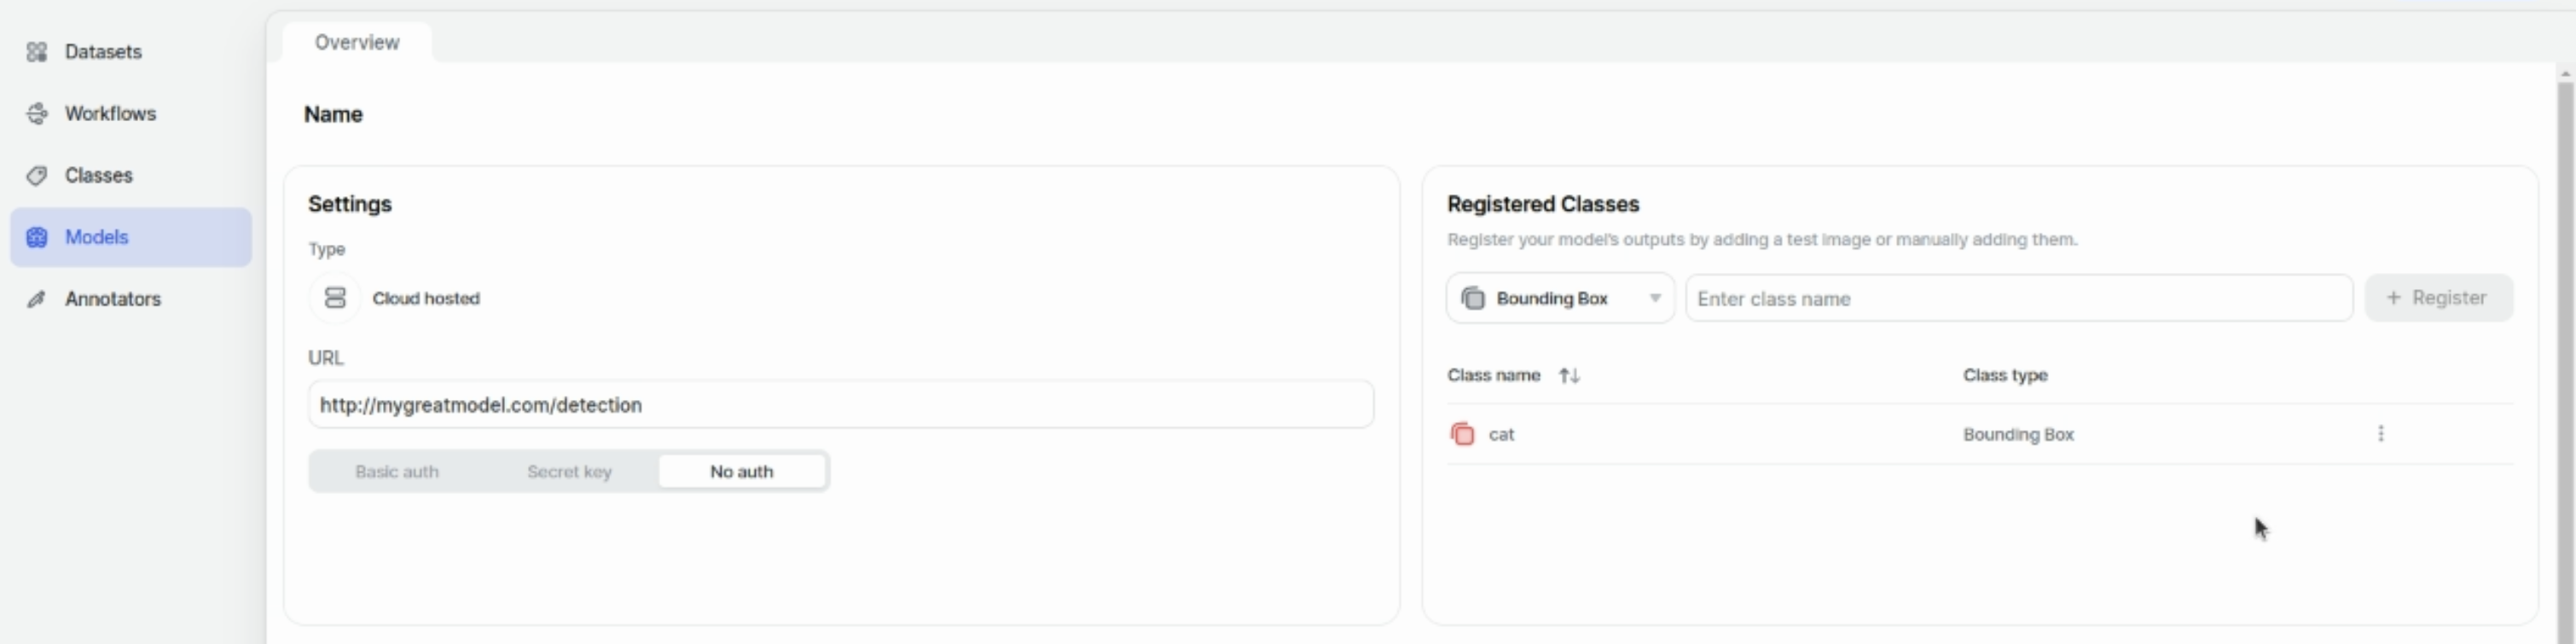
Click the Register External Model button in the Models page of your V7 team. The URL here, shown on the left of the image, will point to where your model is hosted, for example obtained from the public IP address of the created ec2 instance shown above.
The classes can also be manually registered when registering the model, through the Registered Classes section on the right-hand side of the page, as shown in the image below.
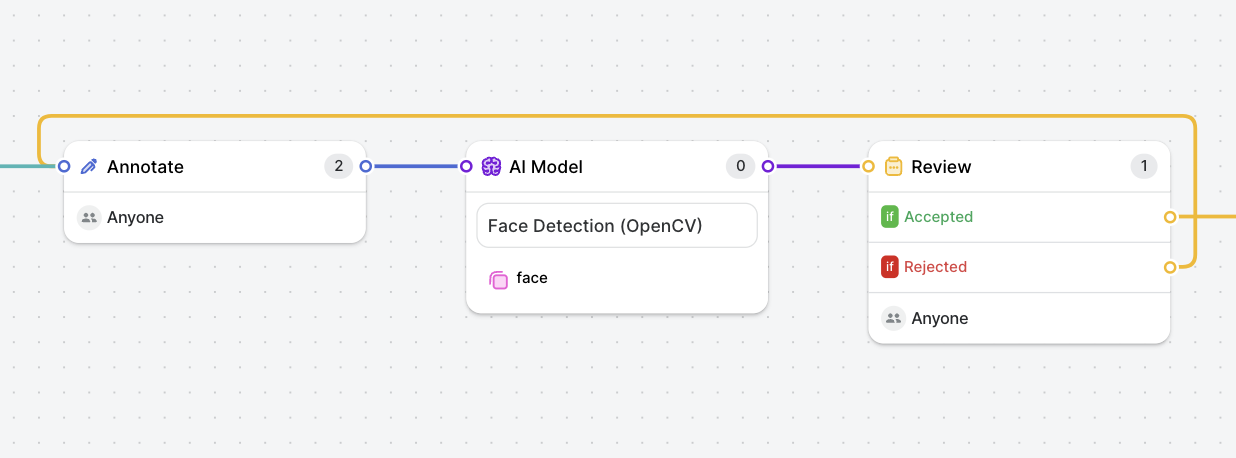
Step 4: Use your registered model within your workflow
After successful registration of your model, you can add this stage using the 'AI Model' stage in your workflow, by connecting your model and mapping the output classes to classes defined in V7. The model can also be used as part of the auto-annotate stage
Use Cases
- Reduce human annotation time with model-assisted labelling.
- Direct access to open source models for detection and segmentation tasks in your workflows.
- Easier benchmarking and model performance testing - use of the external model(s) within a consensus stage allows for benchmarking model performance against other models and/or human annotators, or visualizing model performance on validation/test datasets.
- Using models across multiple teams - simple way to connect the same model across multiple accounts to experiment on different datasets and use cases.
Updated 10 months ago